- Welcome
- Features
- Use Case
- Introduction
- Working with CCR
- Basic navigation and usage tips
-
Working with patients
- Working with patients
- Searching for a patient
- Looking up a patient with an MRN
- Using the Quick Search Utility to search for a patient
- Performing an advanced search
- Performing a search with criteria based on study or cancer group specific attributes
- Restrictions on searches
- Adding a patient
- Adding a patient who has never been a UUHSC patient
- Removing a patient record from a cancer group database
- Viewing/editing a patient record
- Marking a patient record ready for review
- Viewing/editing the demographic information of a patient who has never been a UUHSC patient
- Viewing a patient's clinic visit patient review page
- Providers
- Treatment protocols
- Diagnoses and staging
- Tumors
- Race
- Patient classifications
- Aliases
- Cancer group studies administration
- Patient contacts
-
Studies and study enrollment
- Studies
- Viewing/editing study-specific data for a patient
- Viewing/editing a patient's enrollment in a study
- Study enrollment
- Enrolling a patient in a study
- Removing a patient from a study
- Viewing/editing a patient's enrollment in a study from the patient detail window
- Patient consents
- Patient consents (study enrollment window)
- Recording a patient consents
- Recording a patient consents (study enrollment window)
- Deleting a patient consent record
- Deleting a patient consent record (study enrollment window)
- Editing a patient consent record
- Editing a patient consent record (study enrollment window)
- Scanned consent forms
- Scanned consent forms (study enrollment window)
- Uploading a scanned consent form
- Uploading a scanned consent form (study enrollment window)
- Removing a scanned consent form
- Removing a scanned consent form (study enrollment window)
- Viewing a previously uploaded consent form
- Viewing a previously uploaded consent form (study enrollment window)
-
Specimens
- Specimens
- Adding a specimen to a patient record
- Linking a specimen from itBioPath to a patient record
- Removing a specimen from a patient record
- Viewing/editing a specimen in a patient record
- Accessing a specimen's itBioPath record
- Recording an alias for a specimen
- Deleting a specimen alias
- Editing a specimen alias
- Linking a previously unlinked specimen to an itBioPath record
- Specimens associated with a medical event
- Linking a medical event to an existing specimen in the patient record
- Adding a specimen to a medical event
- Linking a specimen from itBioPath to a medical event
- Removing a specimen from a medical event
- Viewing/editing a specimen that is associated with a medical event
-
Lab tests
- Lab tests
- Setting up a lab test type to be automatically imported into the patient records of a cancer group
- Adding lab rest results to a patient record
- Reviewing a patient's UUHSC lab test records for importing into CCR
- Deleting a lab test result from a patient record
- Viewing/editing a lab test result
- Lab tests associated with a medical event
- Adding lab test results to a medical event
- Linking a medical event to a previously entered lab test result record
- Adding a lab test result to a medical event and a patient record at the same time
- Removing a lab test result from a medical event
- Viewing/editing a lab test result that is associated with a medical event
-
Medical events
- Medical events
- Adding a medical event to a patient record
- Removing a medical event to a patient record
- Viewing/editing a medical event
- Tools to facilitate medical event data entry
- Associated medical events
- Associating a medical event with other medical events
- Removing a medical event's association with another medical event
- CPT codes
- Adding a CPT code to a medical event
- Removing a CPT code to a medical event
- Medical event classification
- Assigning a classification to a medical event
- Removing a classification from a medical event
-
Chemo and systemic therapy events
- Chemo and systemic therapy events
- Therapy agents
- Entering the default agents for a specific therapy regimen
- Adding a therapy agent to a chemotherapy medical event record
- Removing a therapy agent from a chemotherapy medical event record
- Resetting therapy agents and dosages to match the default values for a selected regimen
- Editing a therapy agent record in a chemotherapy medical event
- Chemotherapy adverse events
- Adding an adverse event record to a chemotherapy medical event
- Removing an adverse event record to a chemotherapy medical event
- Editing an adverse event in a chemotherapy medical event
-
Radiation therapy events
- Radiation therapy events
- Treatment summaries
- Adding a radiation therapy sequence to a radiation therapy medical event
- Deleting a radiation therapy sequence to a radiation therapy medical event
- Editing a radiation therapy sequence in a radiation therapy medical event
- Radiation therapy adverse events
- Adding an adverse event record to a radiation therapy medical event
- Deleting an adverse event record from a radiation therapy medical event
- Editing an adverse event record for a radiation therapy medical event
-
Imaging events
- Imaging events
- Images
- Adding an image to an imaging event
- Uploading an image from an imaging event
- Adding an image to an imaging event without uploading it
- Viewing an image from an imaging event
- Deleting an image from an imaging event
- Editing the description of an image
- Findings
- Adding a finding from an imaging event
- Deleting a finding from an imaging event
- Editing a finding from an imaging event
-
Enterprise data warehouse and tumor registry records
- ITS Enterprise Data Warehouse
- Linking an encounter (medical event) from the Enterprise Data Warehouse to a patient record
- Linking a previously unlinked medical event record to an EDW encounter
- Importing a lab test result from the EDW into a medical event and a patient record at the same time
- Performing a text search of EDW records using keywords associated with a medical event type
- Performing a text search of EDW records using keywords associated with pathology reports
- Performing a text search in an EDW report using a keyword that has not been automatically generated
- Refining the list of EDW reports included in a text search
- Reviewing a patient's UUHSC encounter and clinical records for medical events to add to their CCR record
- Viewing a patient's EDW records
- Viewing a patient's EDW records from within a pathology report record
- Viewing the details of a UUHSC clinical record
- Finding a UUHSC encounter for a patient in EDW
- Viewing a patient's tumor registry records
- Viewing the details of a UUHSC encounter
-
Pathology reports
- Pathology reports
- Adding a pathology report to a medical event
- Linking an existing pathology report to a medical event
- Adding a new (not previously existing) pathology report to a medical event
- Removing a pathology report from a medical event
- Viewing/editing a pathology report
- Tools to facilitate pathology report data entry
-
Using the Patient Review Summary page
- Adding a treatment protocol to a patient record from the patient review page
- Diagnoses and staging from the patient review page
- Diagnoses
- Adding a diagnosis to a patient record from the patient review page
- Deleting a diagnosis to a patient record from the patient review page
- Editing a patient's diagnosis from the patient review page
- Staging
- Adding staging information to a diagnosis
- Deleting staging information from a diagnosis
- Editing Staging Information
- Worklists
- Reports
-
Cancer group administration
- Cancer group administration
- Starting the Cancer Group Administration
- Cancer Group Medical Events Administration
- Adding a Medical Event Type to the List of Medical Event Types of Interest to a Cancer Group
- Removing a Medical Event Type from the List of Medical Event Types of Interest to a Cancer Group
- Editing a Cancer Group Medical Event Type
- Making an Event Type Inactive
- Activating an Inactive Event Type
- Associating a Medical Event Type with a Specific Study
- Removing a Medical Event Type Study Association
- Sharing a Medical Event Type with Another Cancer Group
- Ending the Sharing of a Medical Event Type with a Specific Cancer Group
- Using an Event Type Owned and Shared by Another Cancer Group
- Ceasing the Use of an Event Type Owned and Shared by Another Cancer Group
- Adding a Standard of Care Profile
- Deleting a Standard of Care Profile
- Standard of Care Profiles
- Editing a Standard of Care Profile
- Adding a Checklist Item to a Standard of Care Profile
- Patient Education Materials
- Adding a Patient Education Packet to a Standard of Care Profile
- Removing a Checklist Item from a Standard of Care Profile
- Removing a Patient Education Packet from a Standard of Care Profile
- Viewing the Contents List of a Patient Education Packet
- Auto Generated Events
- Adding an Auto Generated Event to a Standard of Care Profile
- Removing an Auto Generated Event from a Standard of Care Profile
- Editing an Auto Generated Event in a Standard of Care Profile
- The Metabuilder
- Security
- Administering cancer group users
- Administering users — study-based roles
- Dictionaries
A good portion of the relevant information in pathology reports in the EDW is found in large text fields. This means that a person trying to enter this information into an HCI Path Report record is required to scan through a great deal of text to find the specific information that applies to the fields on the Path Report window. Although this cannot be entirely avoided, a tool is provided which allows the user to be taken directly to occurrences of keywords within the text fields, with the idea that these keywords should occur where most of the specifically relevant information for data entry purposes can be found and also that this will allow the person doing the data entry to find the information within the text field in an order that more closely reflects the order the fields appear on the Path Report window, since this information may appear in any order at all within the EDW text fields.
The keywords to be used in the text search are automatically derived from the words appearing as field names and drop-down options on the Path Report window. Not only will the exact words that are used on the Path Report window be found within the text fields, but any words that are spelled similarly or share a similar root with the terms appearing on the Path Report window will also be highlighted. You can also perform a search in any of these reports for any additional keywords that you choose (see the end of this process).
To perform a text search of EDW records related to a path report:
1. Open the Path Report window for the path report record in question. See Viewing/Editing a Pathology Report for instructions on how to do this.
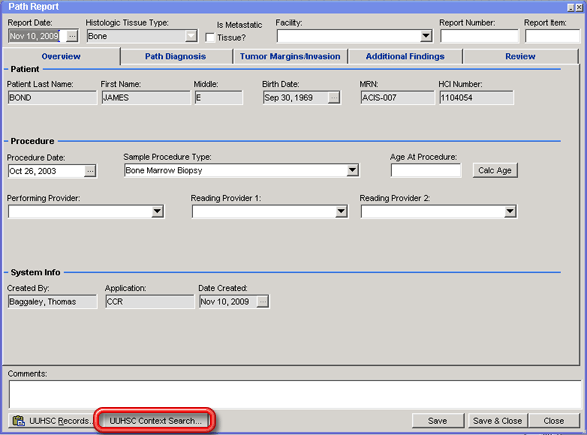
2. Click on the UUHSC Context Search… button in the lower left corner of the Path Report window. The Search ITS Reports window will open displaying the results of the text search of the patient's reports in the EDW whose dates fall within one or two days of the path report's Report Date using keywords based on the field names, labels and drop-down options found on the Path Report window — see The Search ITS Reports Window for a description of this window. Show me the Search ITS Reports window.
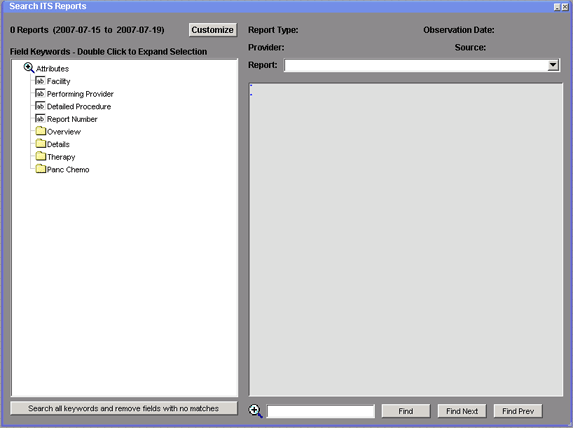
3. Select a keyword from the Field Keywords data tree by double-clicking on the various folders and fields (representing tabs, grids, data groups and fields from the Path Report window) in the tree to expose the keywords from that window that have matches in the patient's EDW reports for the range of reports included in the search and then double-clicking on the keyword whose results you want to view. A list of the matches or near matches from the EDW report text fields will appear in the data tree beneath the keyword.
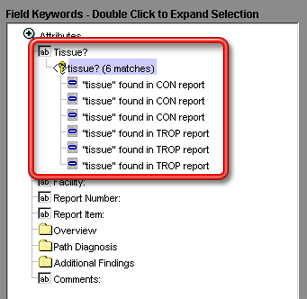
Above: 6 instances of the keyword "tissue" were found in two different EDW reports related to the patient. These instances might coincide with information that might need to be entered into the Tissue? field on the Path Report window.
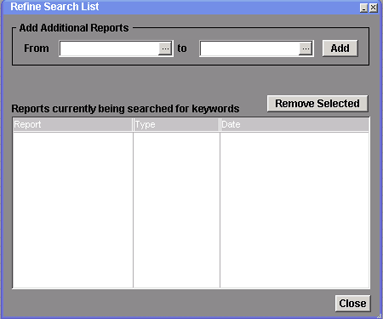
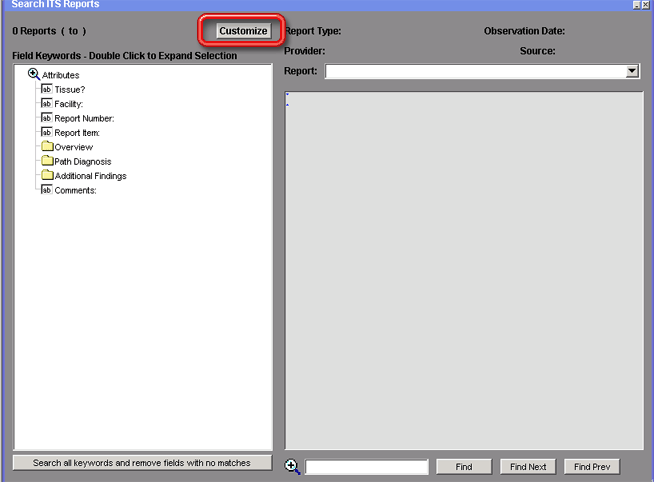
You can change the range of dates from which reports for the patient are being included from the default range or remove specific reports currently being included by clicking on the Customize button at the top of the window and making the adjustments on the Refine Search List window which appears. Show me the Customize button. See Refining the List of EDW Reports Included in a Text Search and The Refine Search List Window for additional information.
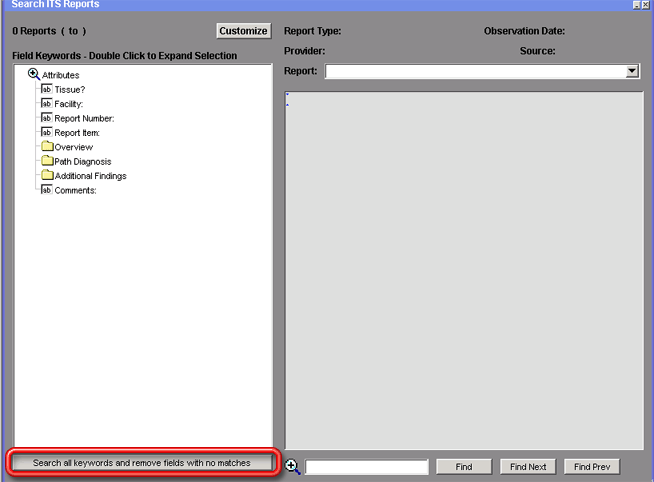
To speed up your search, you can have CCR automatically search all of the included reports for all of the keywords and remove those fields for which there are no results from the data tree by clicking on the button beneath the data tree. Show me this button.
4. Click on one of the matches in the list. The text of the report that the match comes from will appear in the large text box to the right of the data tree with the instance of the matched term highlighted. Show me what this looks like.
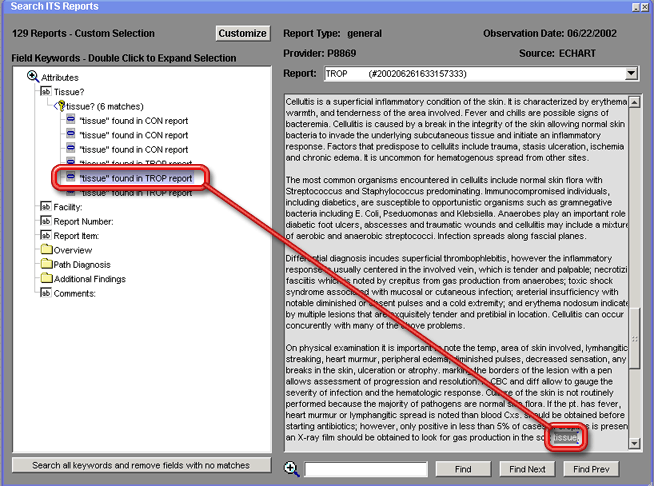
Above: A specific instance of "tissue" within one of the patient's EDW reports.
5. After you have gleaned what information is available from this instance of the keyword (entering pertinent information on the Path Report window), repeat steps three and four as necessary to check other matches and other keywords until you have found all of the necessary path report information that is available through the data tree.
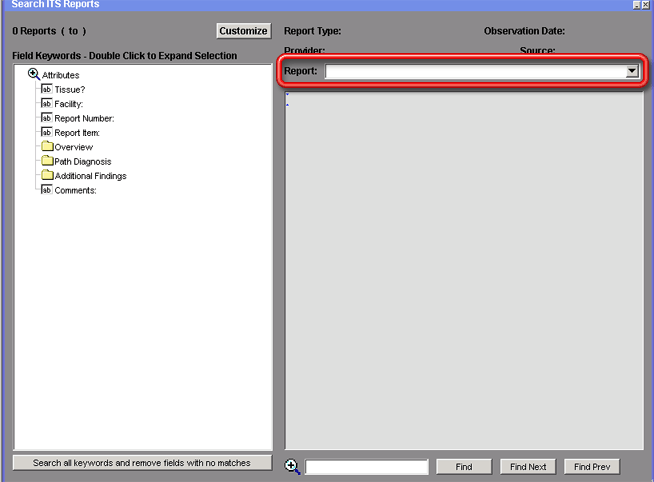
6. Search for your own additional keywords in a given report by first selecting that report in the Report field above the large text field on the right hand side of the window. Show me the Report field. The large text box will be populated with the text from the selected report.
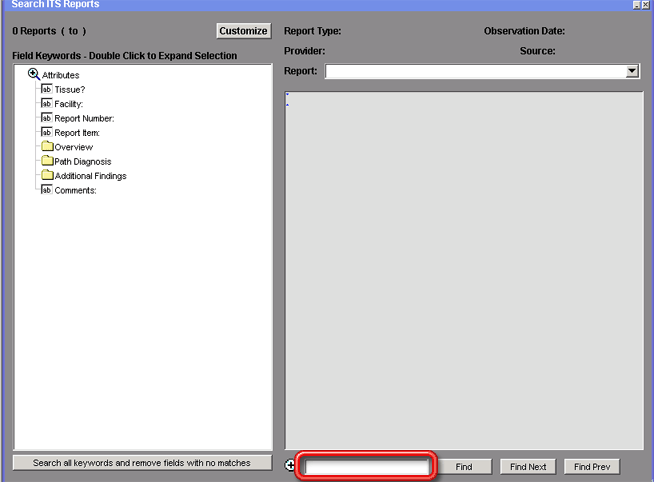
7. Enter the keyword you wish to search for in the report in the small text field beneath the larger report text field. Show me this text field.
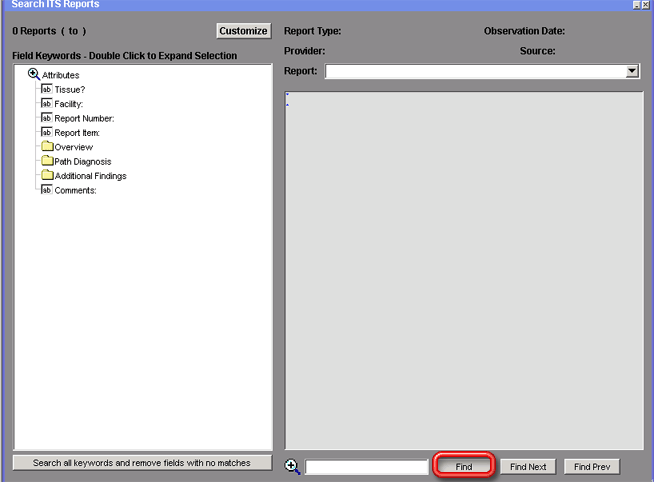
8. Click on the Find button to the right of this text field to find the first instance of the entered text in the report. Show me the Find button.
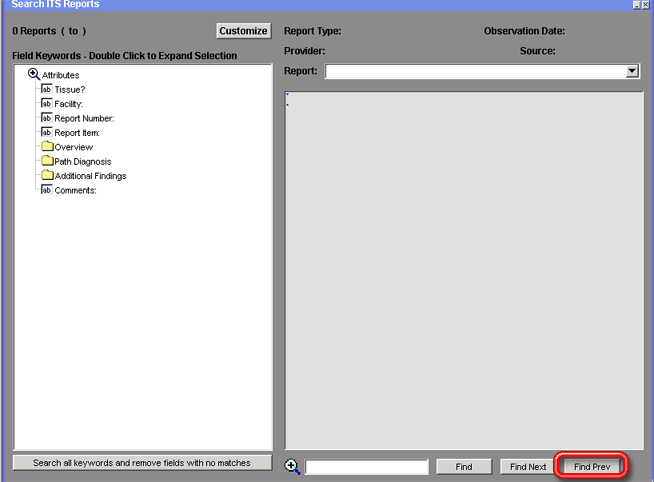
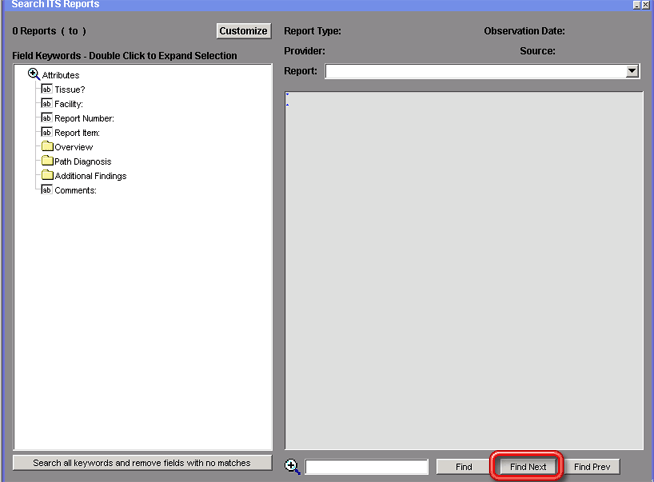
9. Click on the Find Next and Find Prev buttons as necessary to find additional instances of the text in the report. Show me the Find Next button. Show me the Find Prev button.
10. When you are finished using the text search tool, close the Search ITS Reports window by clicking on the X (close) button in the upper right corner of the window. Show me this button.
