- Welcome
- Use case
- Getting Started
-
Searching Records
- Performing a Basic Search
- Performing an Advanced Search
- Performing a List Search
- Performing a Keyword Search of UUMC Pathology Reports for all Patients in the Database
- Performing a Keyword Search of UUMC Pathology Reports for the Patients Associated with a Specific Set of Specimens
- Restrictions on Searches
- Reports
-
iQ Tool
- Adding Columns to a Query
- Starting the iQ Tool
- iQ Tool Window
- Current Query Data Group
- Saved Queries List
- Top Portion of the Selected
- Display or Report Columns Section
- Find/Filters Section
- Running a Preexisting Query
- Creating a Query
- Create Query Window
- Copying and Altering a Preexisting Query
- Removing Columns from a Query
- Editing Column Parameters in a Query
- Changing the Order of Columns in a Query
- Adding Filters to a Query
- Editing Filters in a Query
- Ways of Comparing Data
- Removing Filters From a Query
- Results Window
- Application Data Structure
- Application Database Fields Alphabetical List
- Application Datatree
- Field Paths List for the iQ Tool
-
Adding Specimens to the Database
- Adding a Single Specimen using the Add Specimen Wizard
- Adding a Batch of Specimens using the Add Specimen Expert Tool
- Saving a Batch of Specimens to be added as a Work in Progress
- Finishing a Work in Progress Batch
- Printing Barcodes for a Specimens in a Batch added using the Add Specimen Expert Tool
- Customizing the Add Specimen Expert Tool to Streamline Specimen Batch Entry
- Changing which Box an Add Expert Template Points for Adding Storage
- Importing FFPE Samples from UUMC
- Entering and Editing Specimen Records
- Transformations
- Specimen Disbursement and Registration
- Reports and Records
- Adding a Pathology Report to a Specimen Record
- Performing a DEXT Import of a Pathology Import
- Checking on the status of your DEXT Import Request
- Adding a Medical Record to a Specimen Record
- Editing Patient or Collection Records
- Editing Collection Records
- Editing Patient Records
- Diagnoses
- Adding a Diagnosis to a Patient Record
- Linking an Existing Diagnosis to one or more Collections
- Linking a Collection to a Diagnosis
- Recording a Consent for a Patient
- Reviewing a Patient's Consents
- Uploading a Patient's Consent Form
- Managing Patient Consents
- External (to itBioPath) Data Sources
- Managing Dictionaries
-
Storage
- Editing Aliquots
- Connecting a Barcode Label Printer to itBioPath
- Removing a Barcode Label Printer from itBioPath
- Freezer Management
- Viewing the Contents of a Box in a Freezer
- Accessing the Specimen Record for the Specimen associated with an Aliquot
- Editing Box Details
- Adding a New Box to a Freezer from the Add Aliquot Window
- Managing Protocols, Projects, and Related User Permissions
- Window, Tab, and Field Descriptions
- Miscellaneous
This process will allow you to upload a consent form for a single patient from the Patient window. Use the Patient Consents module (select Edit-Patient Consents in the menu bar) when adding multiple consents. To upload a scanned consent form for a single patient:
- Open the Patient window for the patient in question — see Editing Patient Records for instructions on how to do this.
- Select the Consents/Specimens tab.
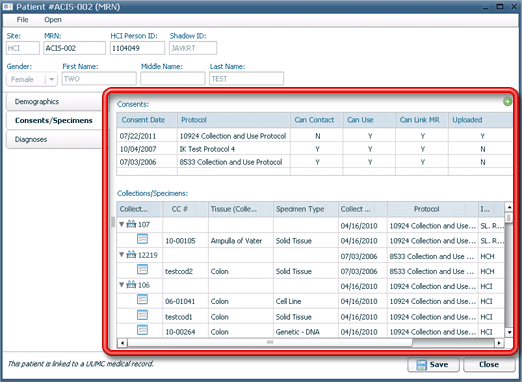
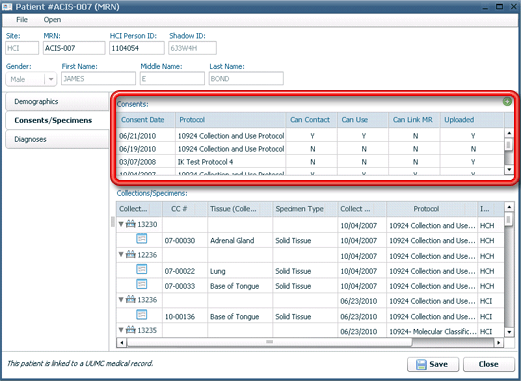
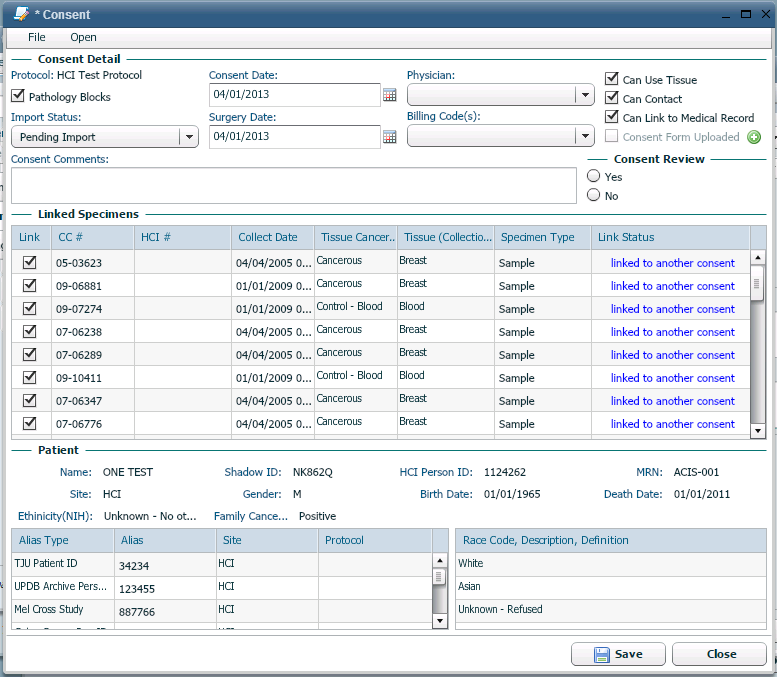
- Double-click the consent record associated with the scanned form intended for upload in the Consents list. The Consent detail window will open.
- Click
 in the upper right part of the window. An open file dialog window will open. Select the file.
- A confirmation dialog will open asking to Confirm Upload of the selected file into the database.
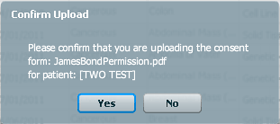
- Click Yes. The form will be uploaded into the database.


