- Welcome
- Use case
- Getting Started
-
Searching Records
- Performing a Basic Search
- Performing an Advanced Search
- Performing a List Search
- Performing a Keyword Search of UUMC Pathology Reports for all Patients in the Database
- Performing a Keyword Search of UUMC Pathology Reports for the Patients Associated with a Specific Set of Specimens
- Restrictions on Searches
- Reports
-
iQ Tool
- Adding Columns to a Query
- Starting the iQ Tool
- iQ Tool Window
- Current Query Data Group
- Saved Queries List
- Top Portion of the Selected
- Display or Report Columns Section
- Find/Filters Section
- Running a Preexisting Query
- Creating a Query
- Create Query Window
- Copying and Altering a Preexisting Query
- Removing Columns from a Query
- Editing Column Parameters in a Query
- Changing the Order of Columns in a Query
- Adding Filters to a Query
- Editing Filters in a Query
- Ways of Comparing Data
- Removing Filters From a Query
- Results Window
- Application Data Structure
- Application Database Fields Alphabetical List
- Application Datatree
- Field Paths List for the iQ Tool
-
Adding Specimens to the Database
- Adding a Single Specimen using the Add Specimen Wizard
- Adding a Batch of Specimens using the Add Specimen Expert Tool
- Saving a Batch of Specimens to be added as a Work in Progress
- Finishing a Work in Progress Batch
- Printing Barcodes for a Specimens in a Batch added using the Add Specimen Expert Tool
- Customizing the Add Specimen Expert Tool to Streamline Specimen Batch Entry
- Changing which Box an Add Expert Template Points for Adding Storage
- Importing FFPE Samples from UUMC
- Entering and Editing Specimen Records
- Transformations
- Specimen Disbursement and Registration
- Reports and Records
- Adding a Pathology Report to a Specimen Record
- Performing a DEXT Import of a Pathology Import
- Checking on the status of your DEXT Import Request
- Adding a Medical Record to a Specimen Record
- Editing Patient or Collection Records
- Editing Collection Records
- Editing Patient Records
- Diagnoses
- Adding a Diagnosis to a Patient Record
- Linking an Existing Diagnosis to one or more Collections
- Linking a Collection to a Diagnosis
- Recording a Consent for a Patient
- Reviewing a Patient's Consents
- Uploading a Patient's Consent Form
- Managing Patient Consents
- External (to itBioPath) Data Sources
- Managing Dictionaries
-
Storage
- Editing Aliquots
- Connecting a Barcode Label Printer to itBioPath
- Removing a Barcode Label Printer from itBioPath
- Freezer Management
- Viewing the Contents of a Box in a Freezer
- Accessing the Specimen Record for the Specimen associated with an Aliquot
- Editing Box Details
- Adding a New Box to a Freezer from the Add Aliquot Window
- Managing Protocols, Projects, and Related User Permissions
- Window, Tab, and Field Descriptions
- Miscellaneous
The Add Specimen Expert tool provides a table-based interface for entering collection data for multiple specimens at the same time. The template can be customized to hide unnecessary columns. Only fields that apply to the specimens being entered will be displayed. Before attempting to customize a template, it is important to have a good understanding of the basic overall process for adding specimens — see Adding a Single Specimen Using the Add Specimen Wizard. To create a template for the Add Specimen Expert Tool:
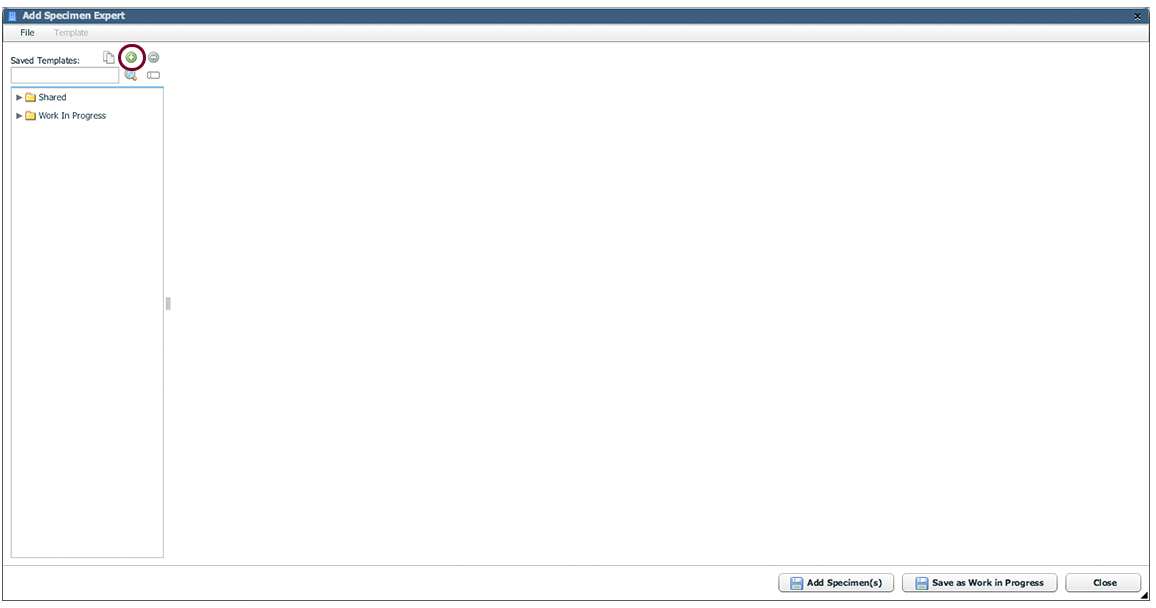
- Select Edit > Add Specimens > Add Specimen Expert from the menu bar at the top of the itBioPath application window. The Add Specimen Expert window will open.

- Shared templates and Works in Progress will be visible in the new window. To create a new template click the add button. A new template will be created with all of the columns visible. *To copy an existing template, select the template from the list and click the copy icon.
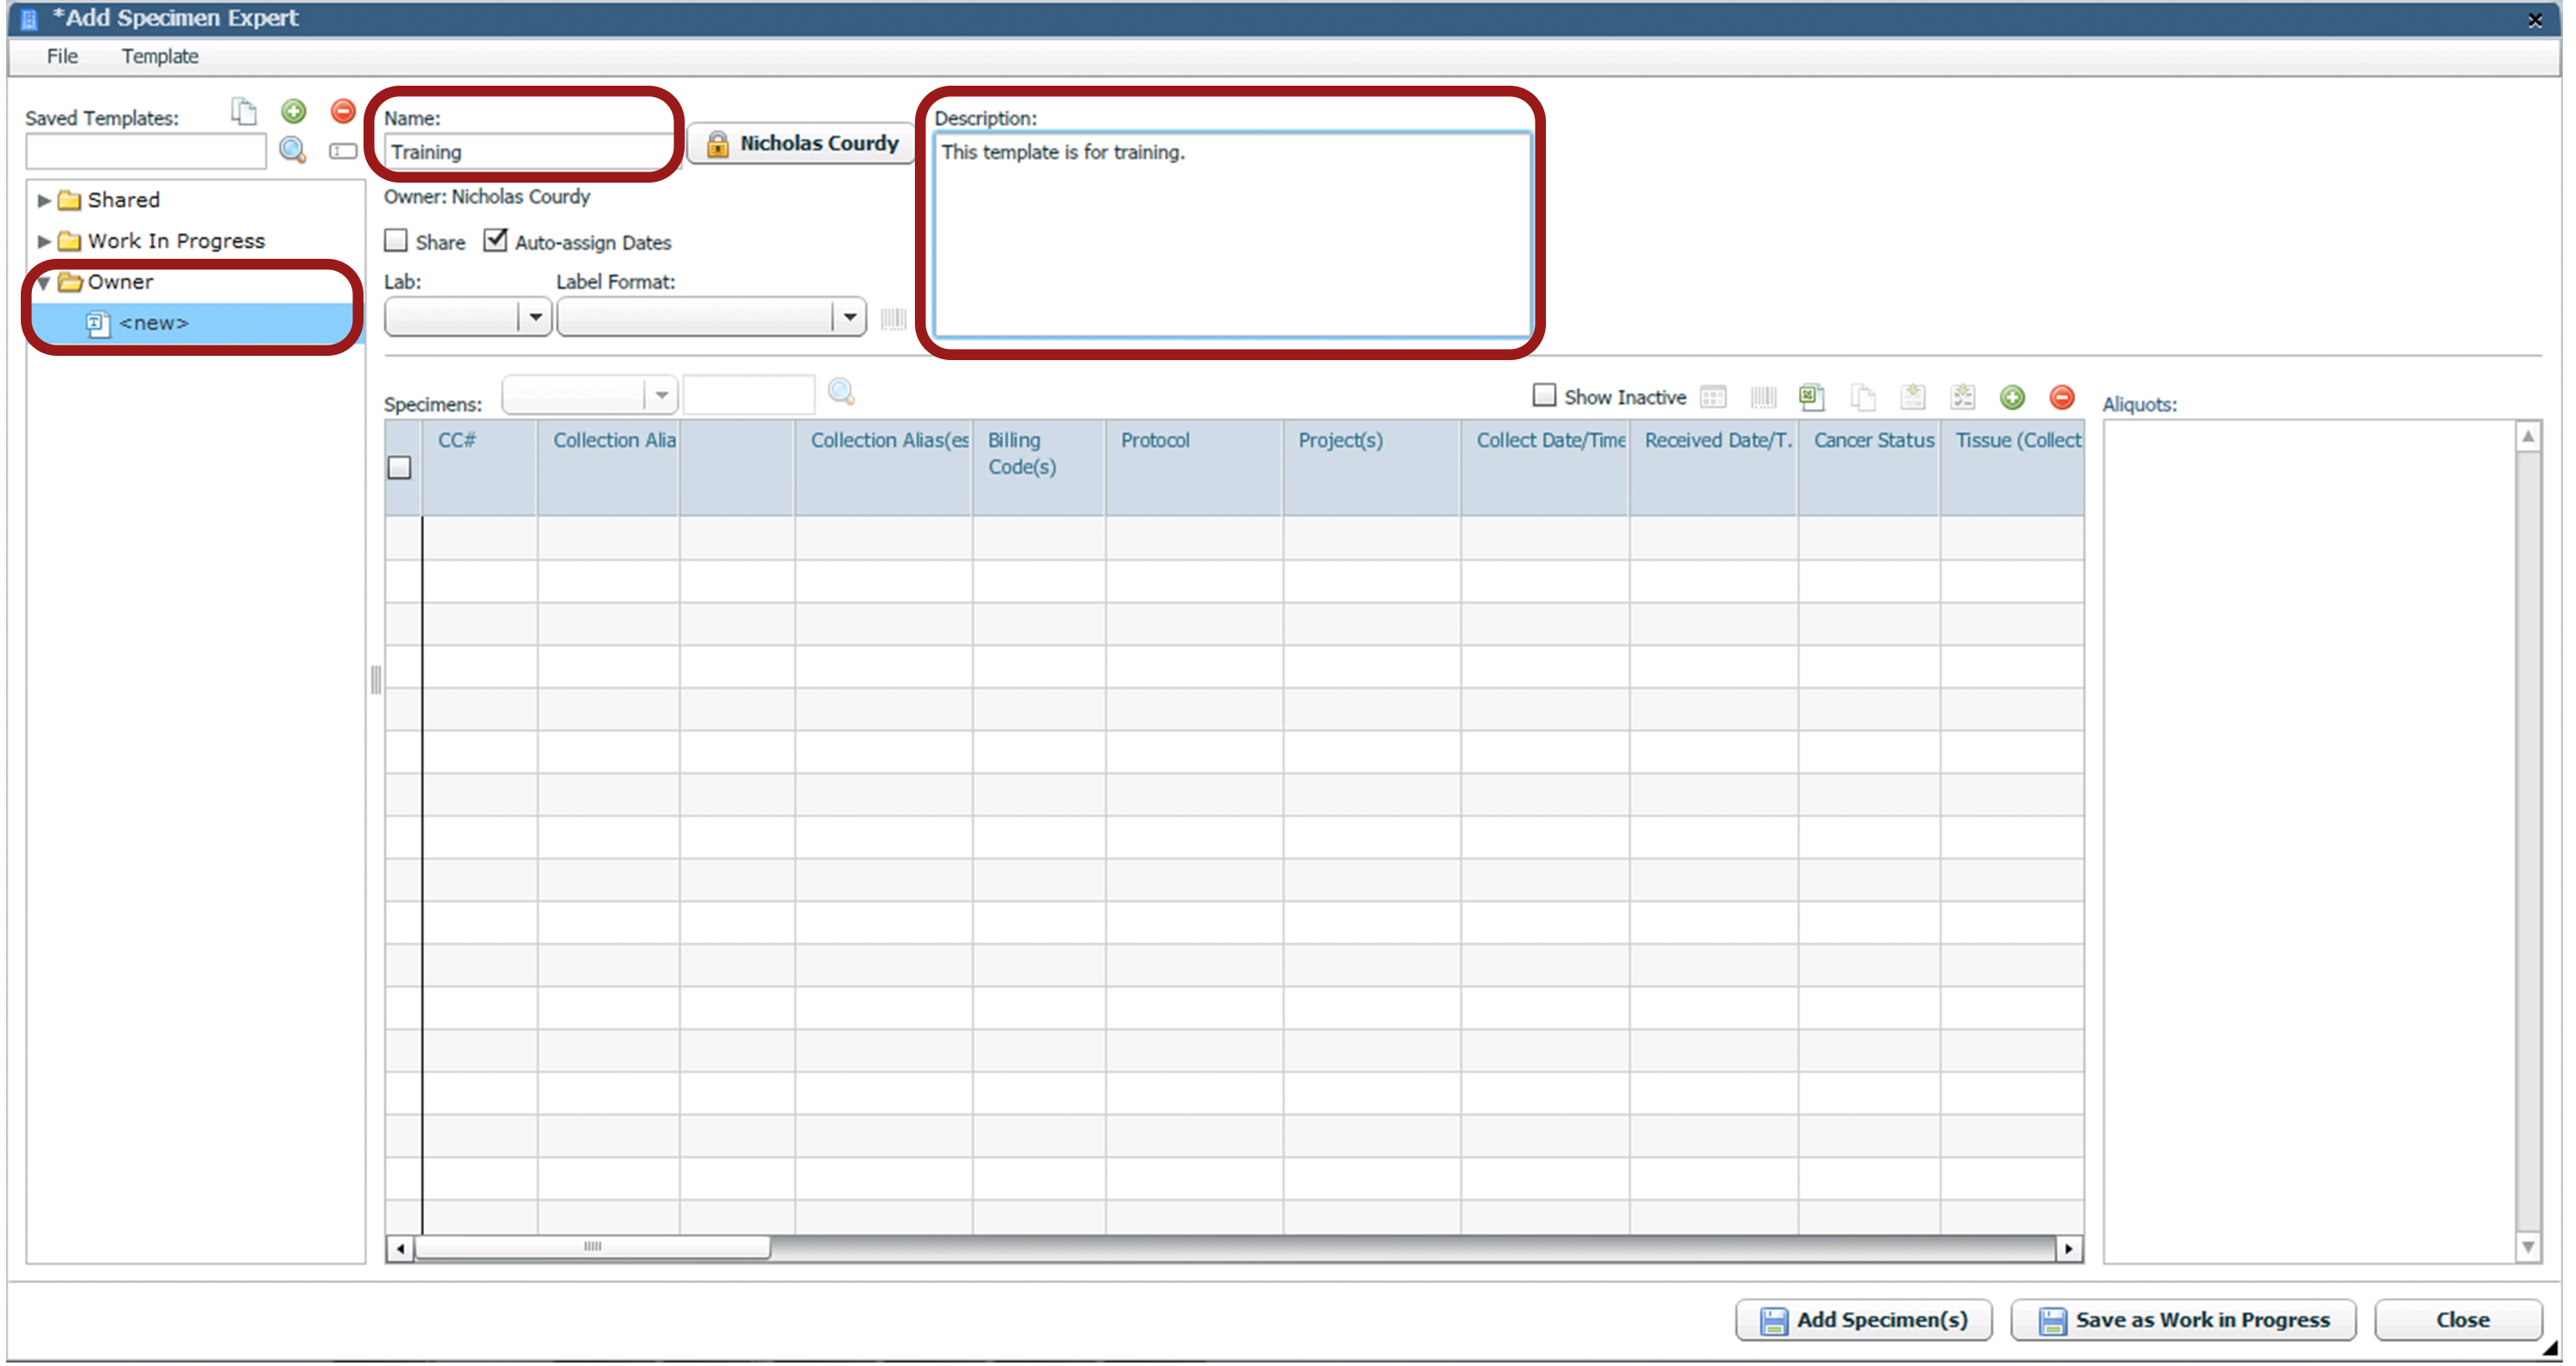
- The Owner folder will appear with the new template. Name the new template by clicking in the name field and typing. Enter a description for the template in the Description field. Descriptions are helpful for shared templates. Other users can quickly identify the function of the template. Check the Share option to share the template. A template that is shared is visible to everyone.
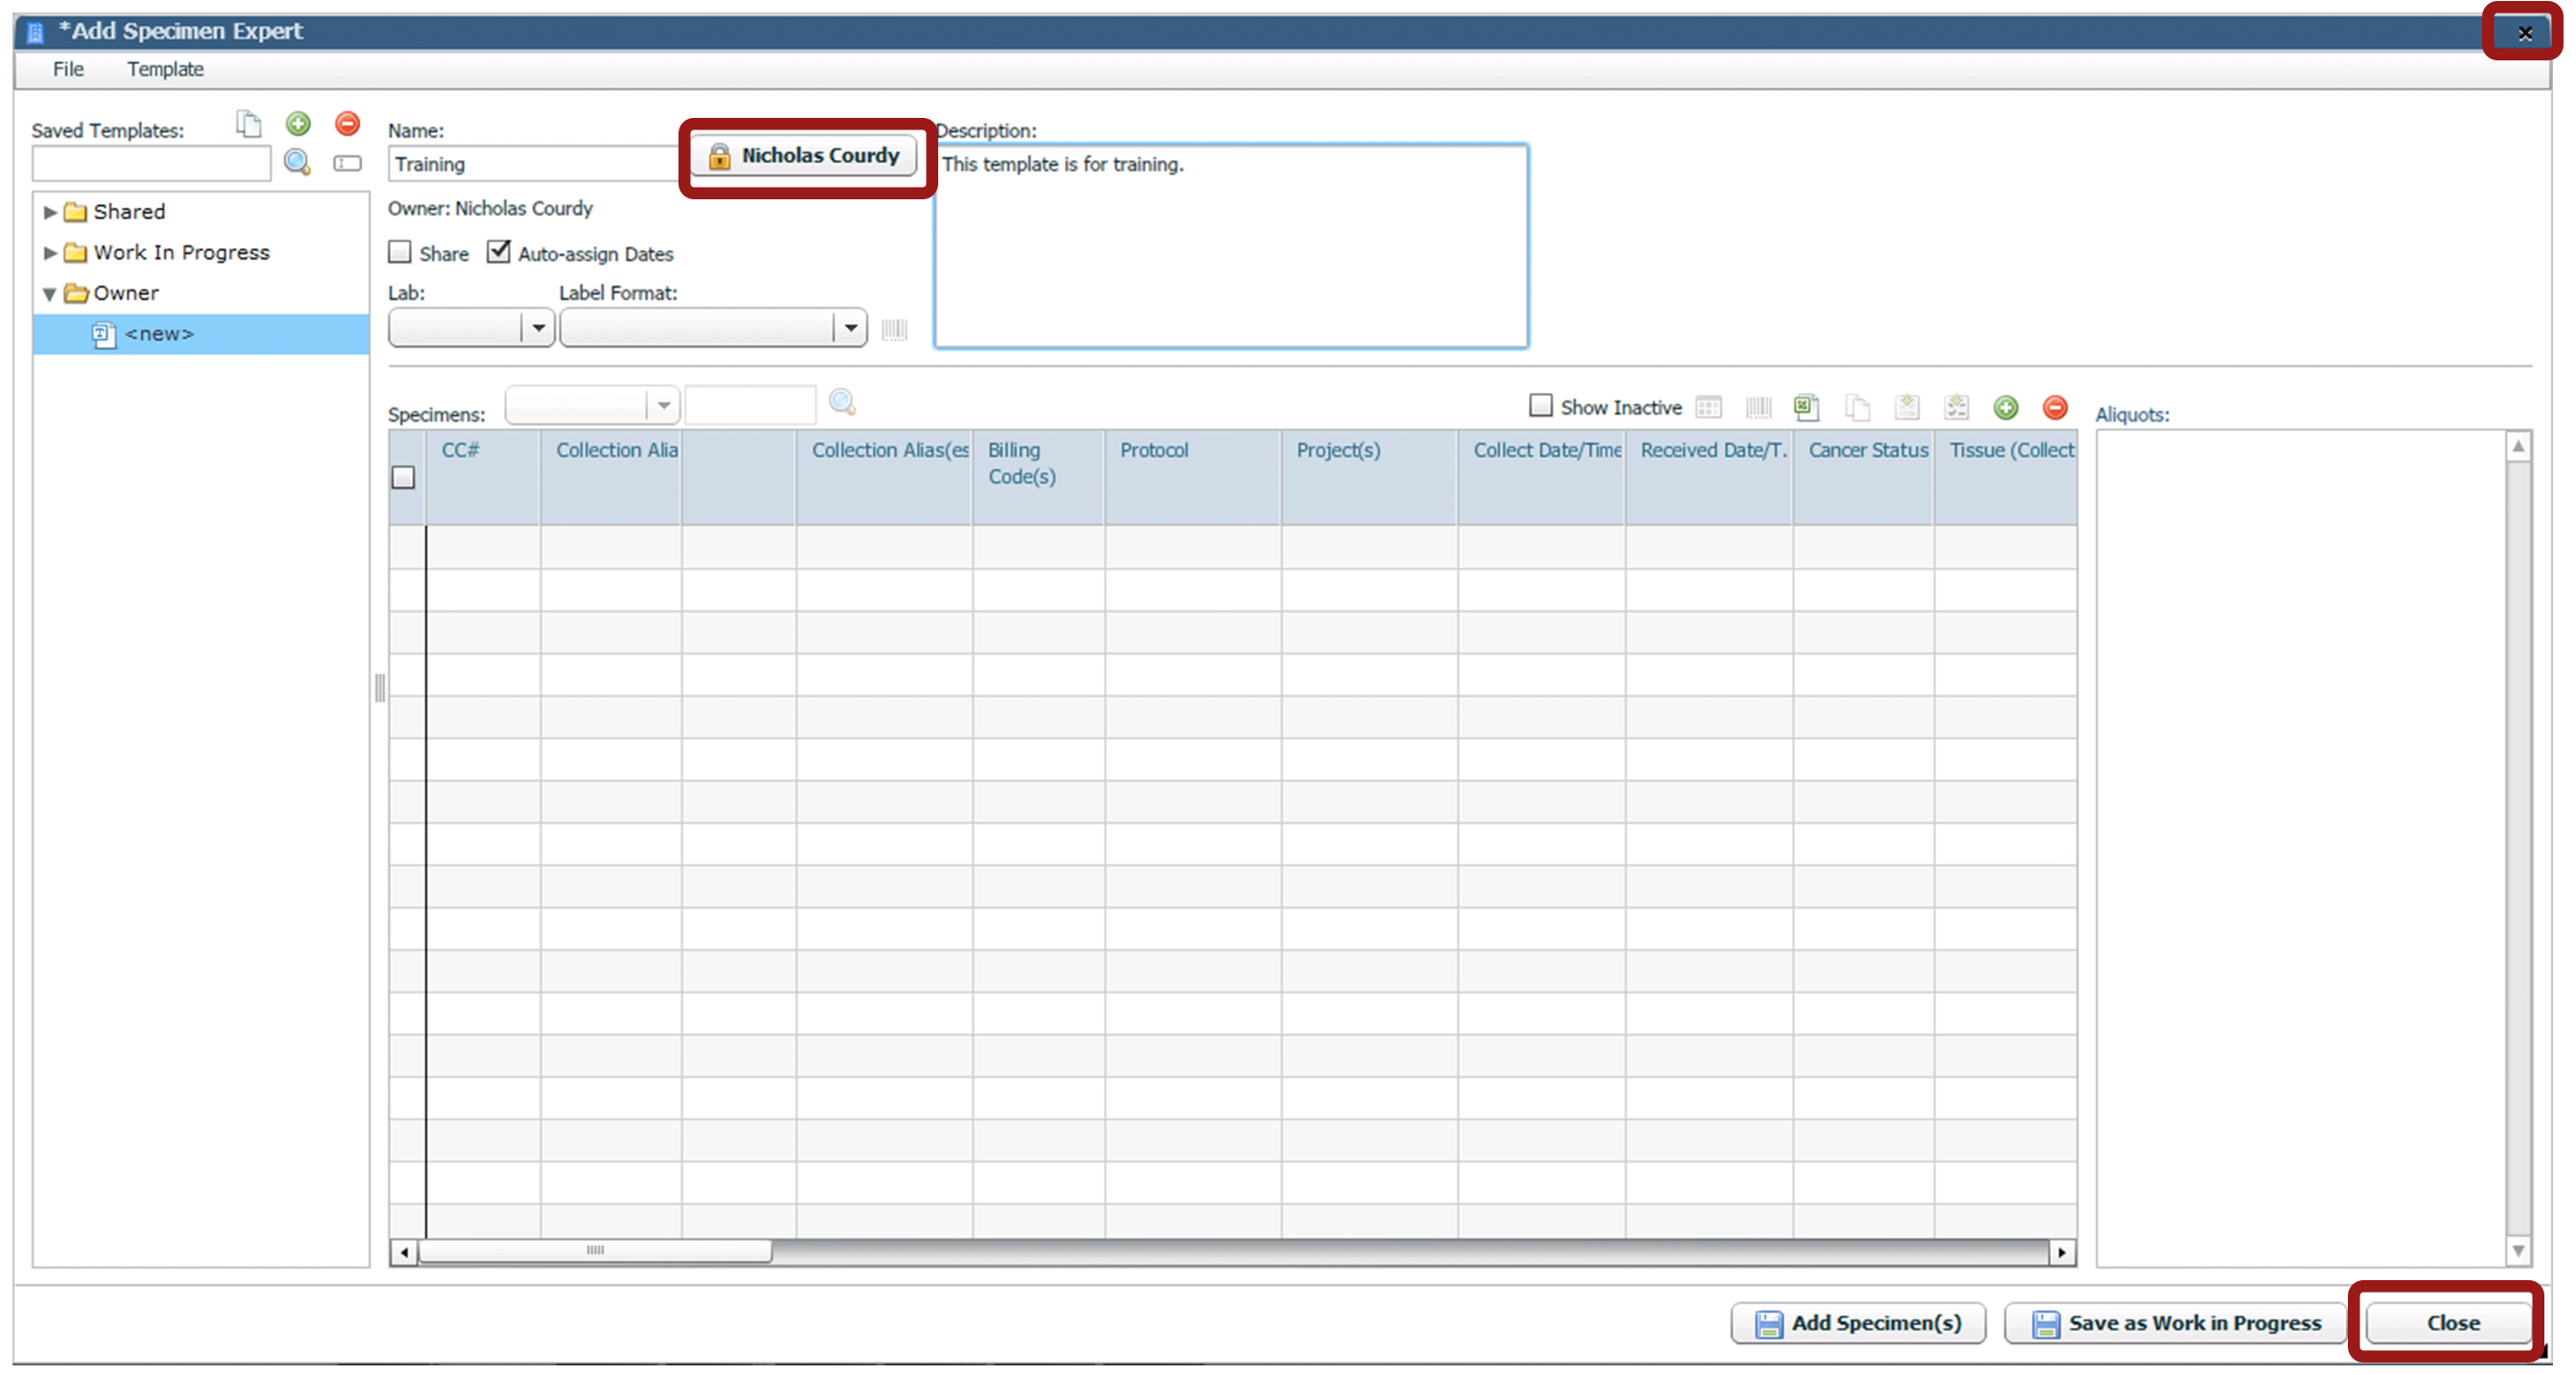
- The lock icon and name at the top of the template indicates the current user. The template is only editable by the first user to open the template. Other users can view the template, but any changes will not be saved. To unlock the template click close or the X.
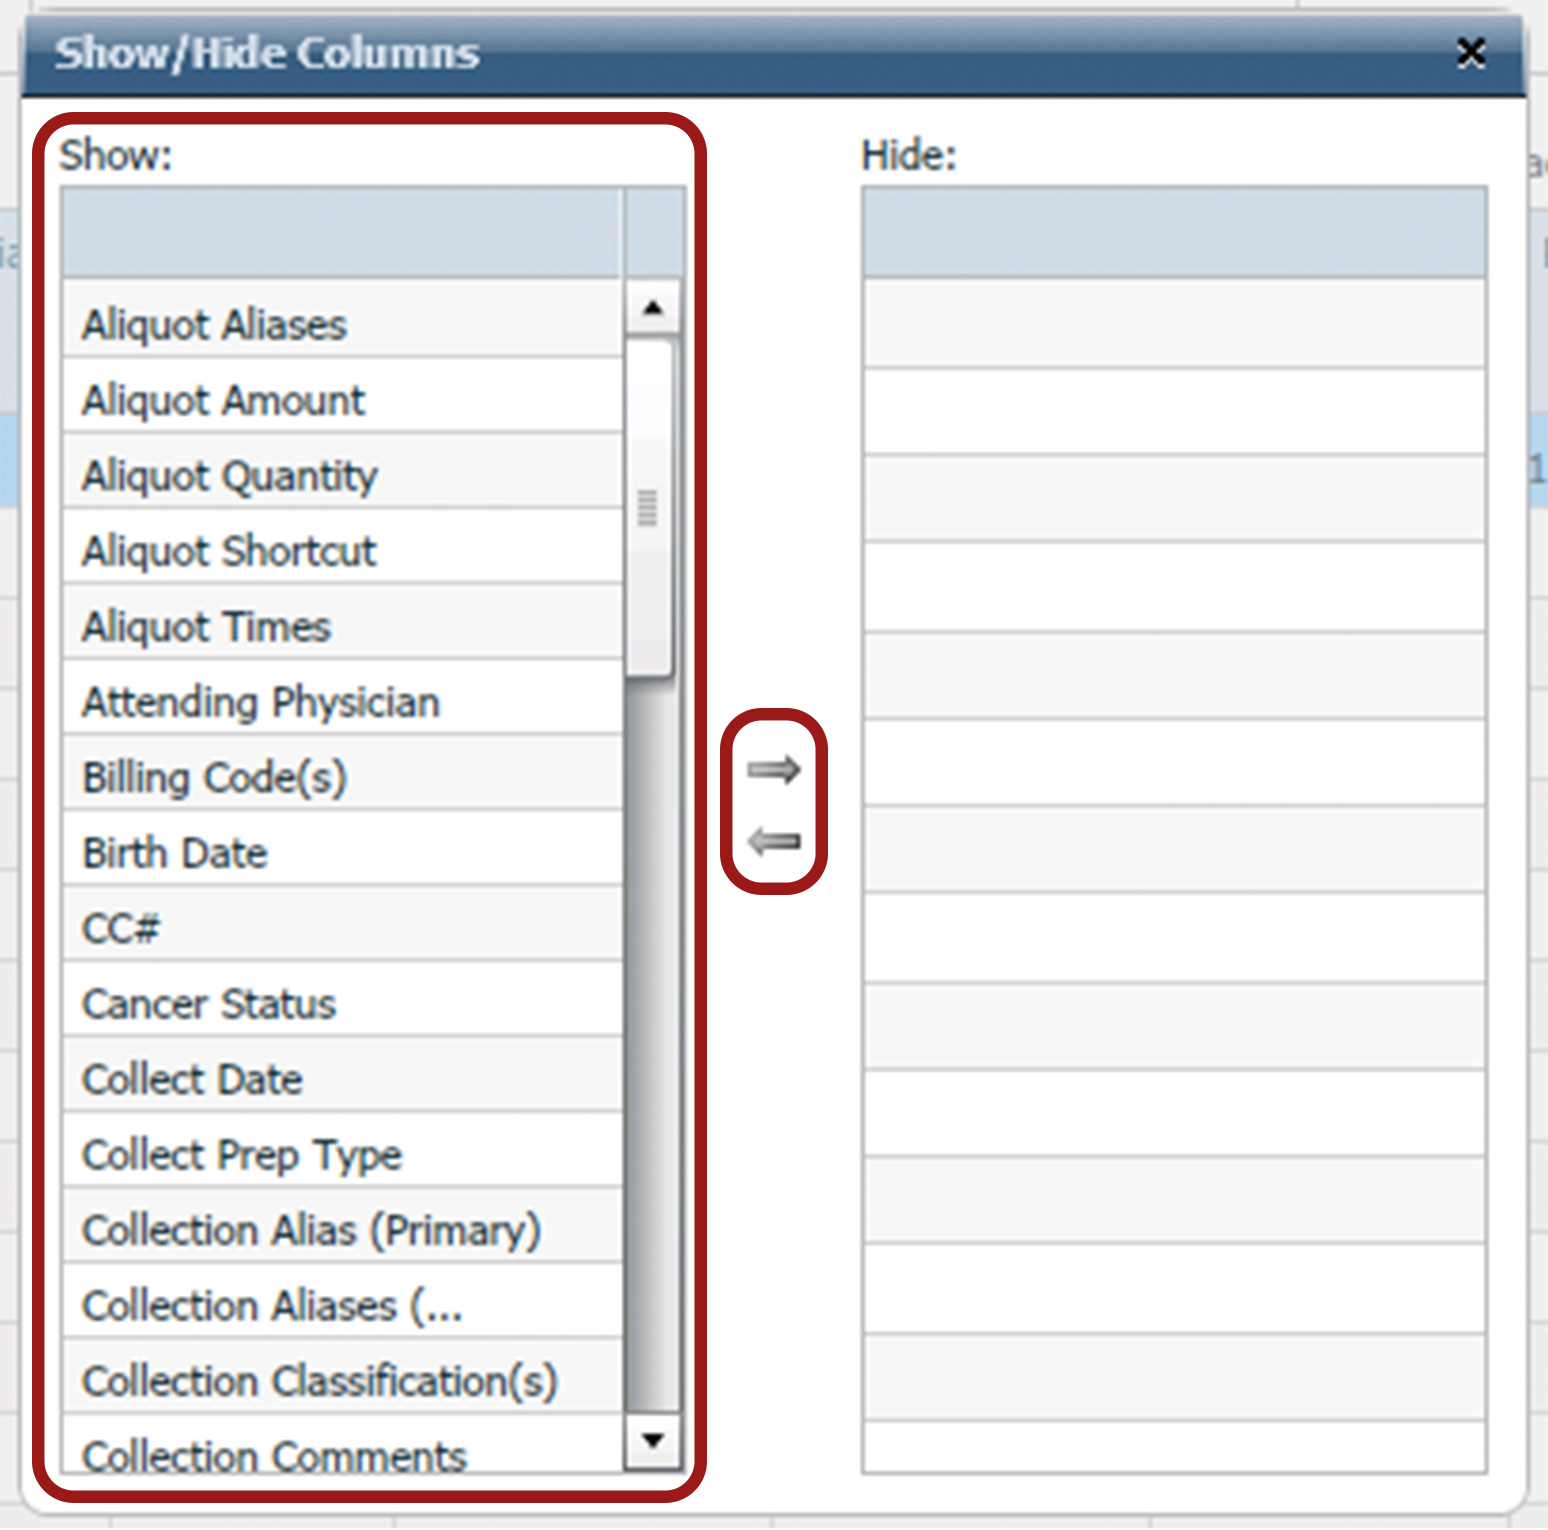
- The Add Specimen Expert includes many different columns for data entry. All templates may not use every column. Choose which columns are visible by navigating to Template > Show/Hide Columns. A new window will appear.
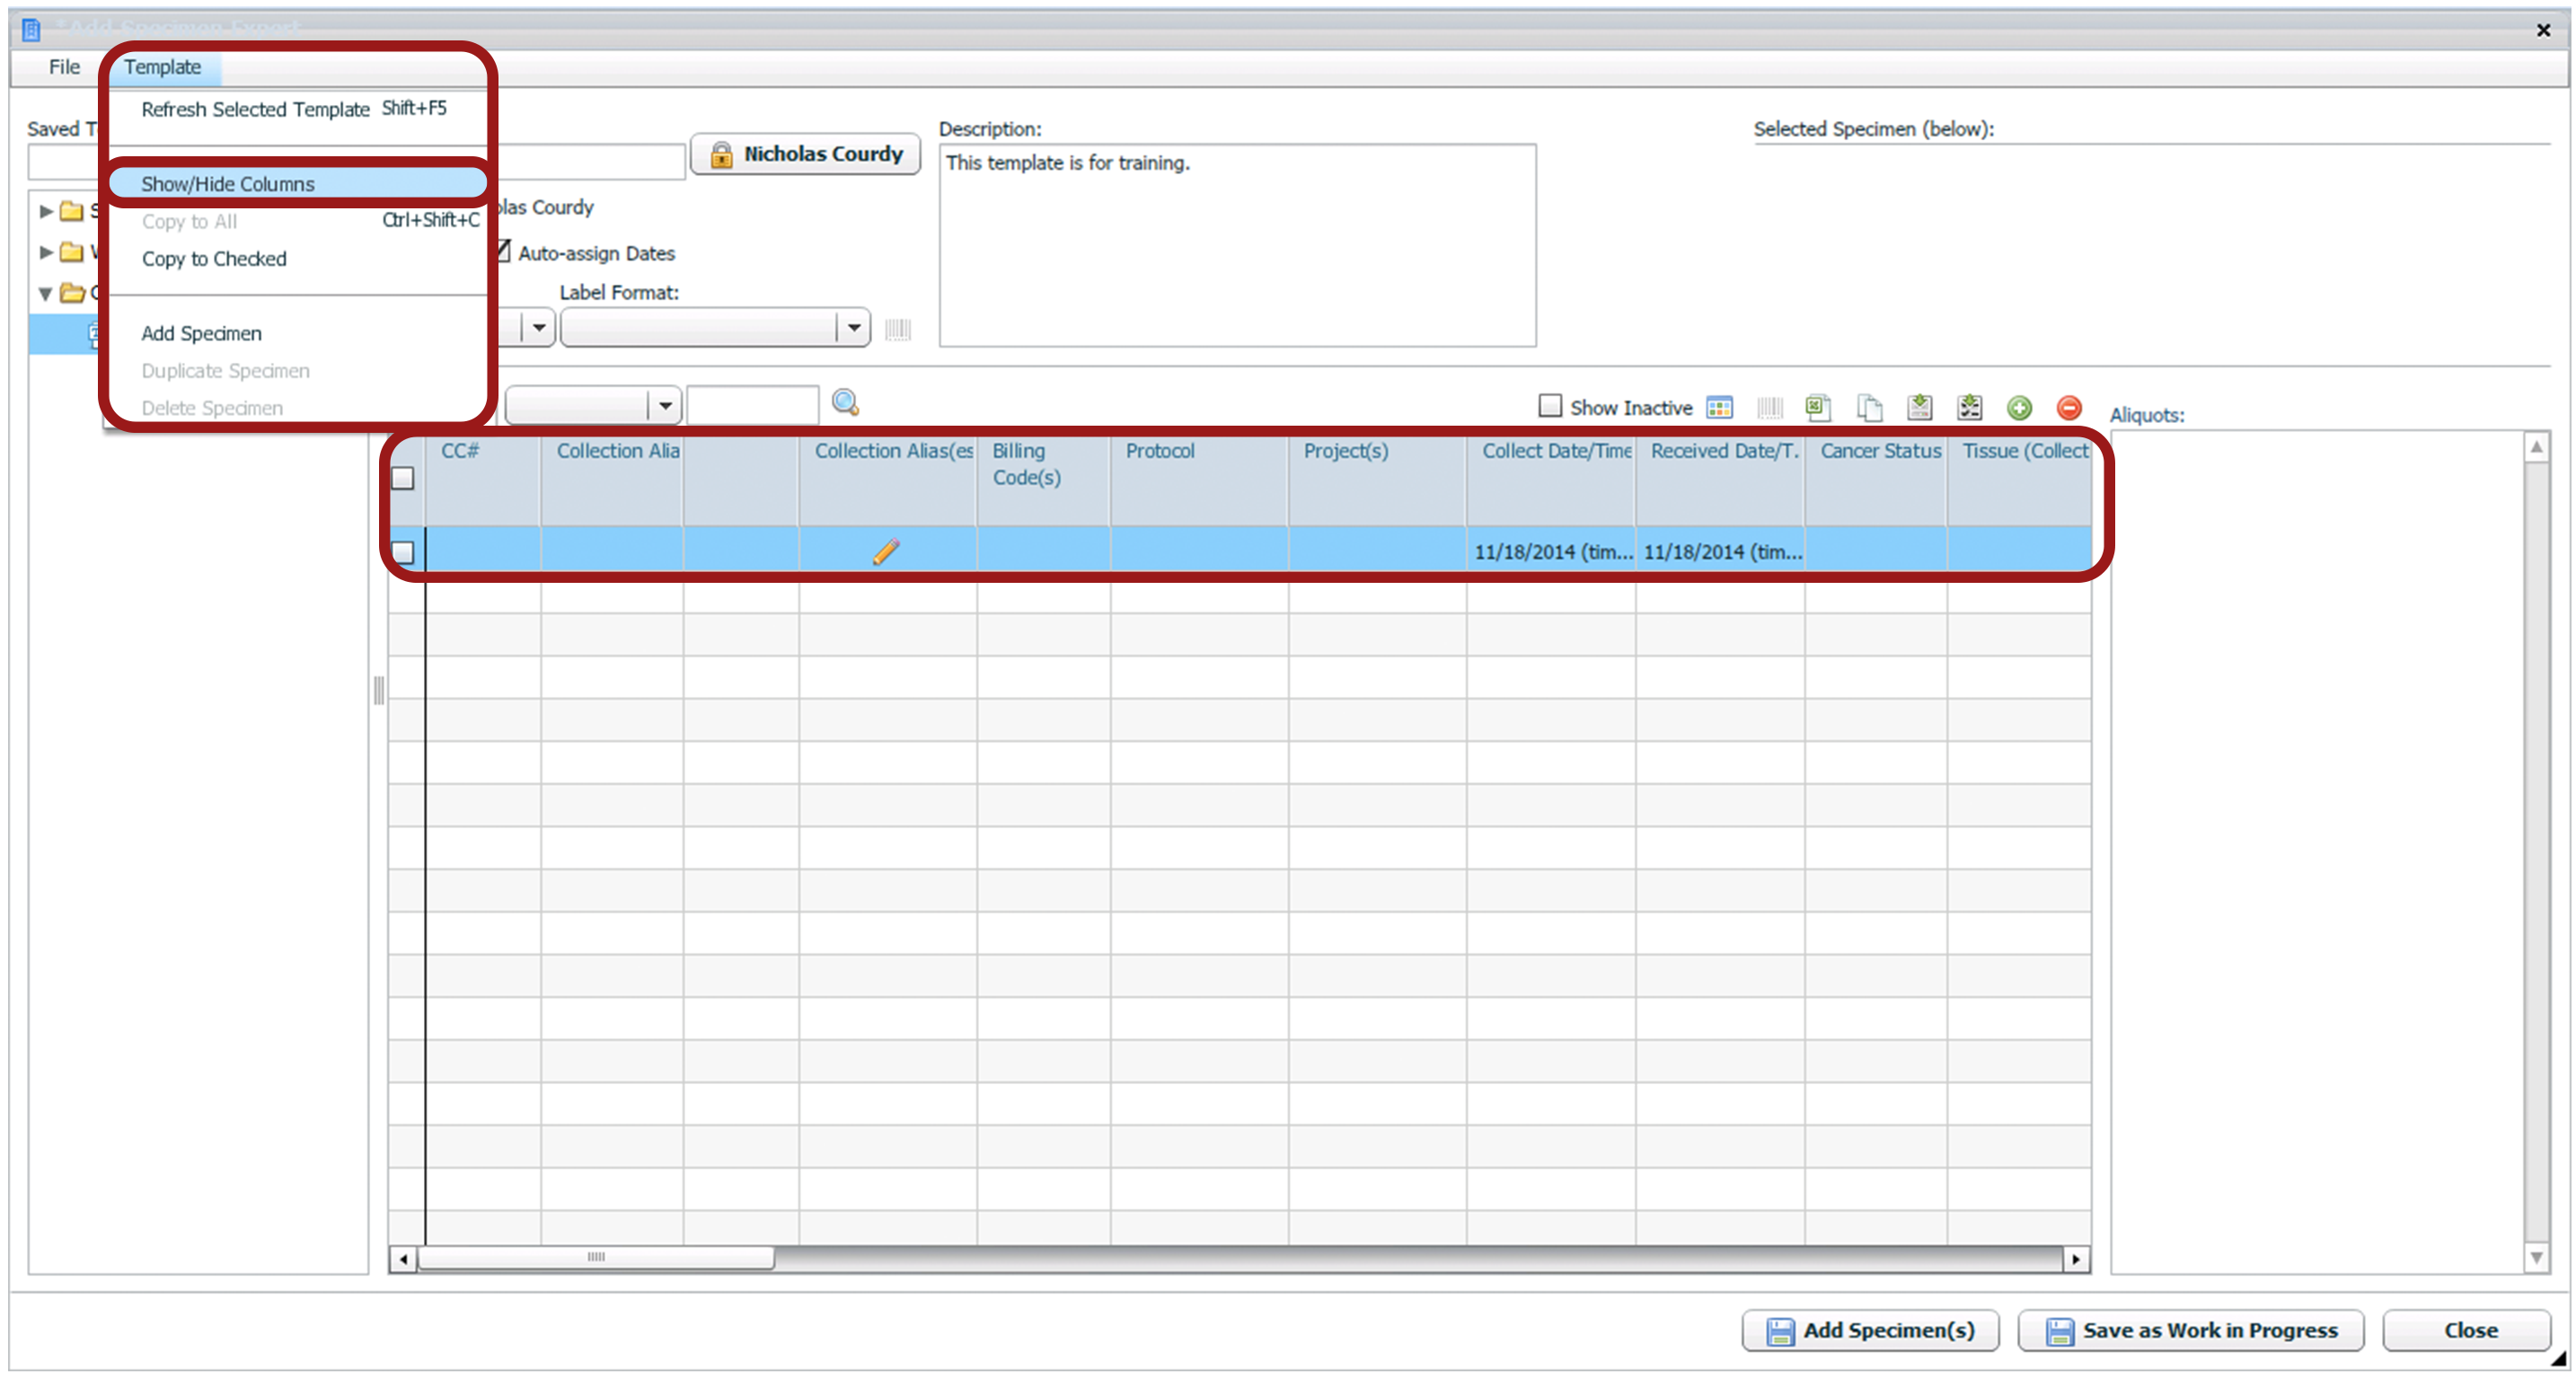
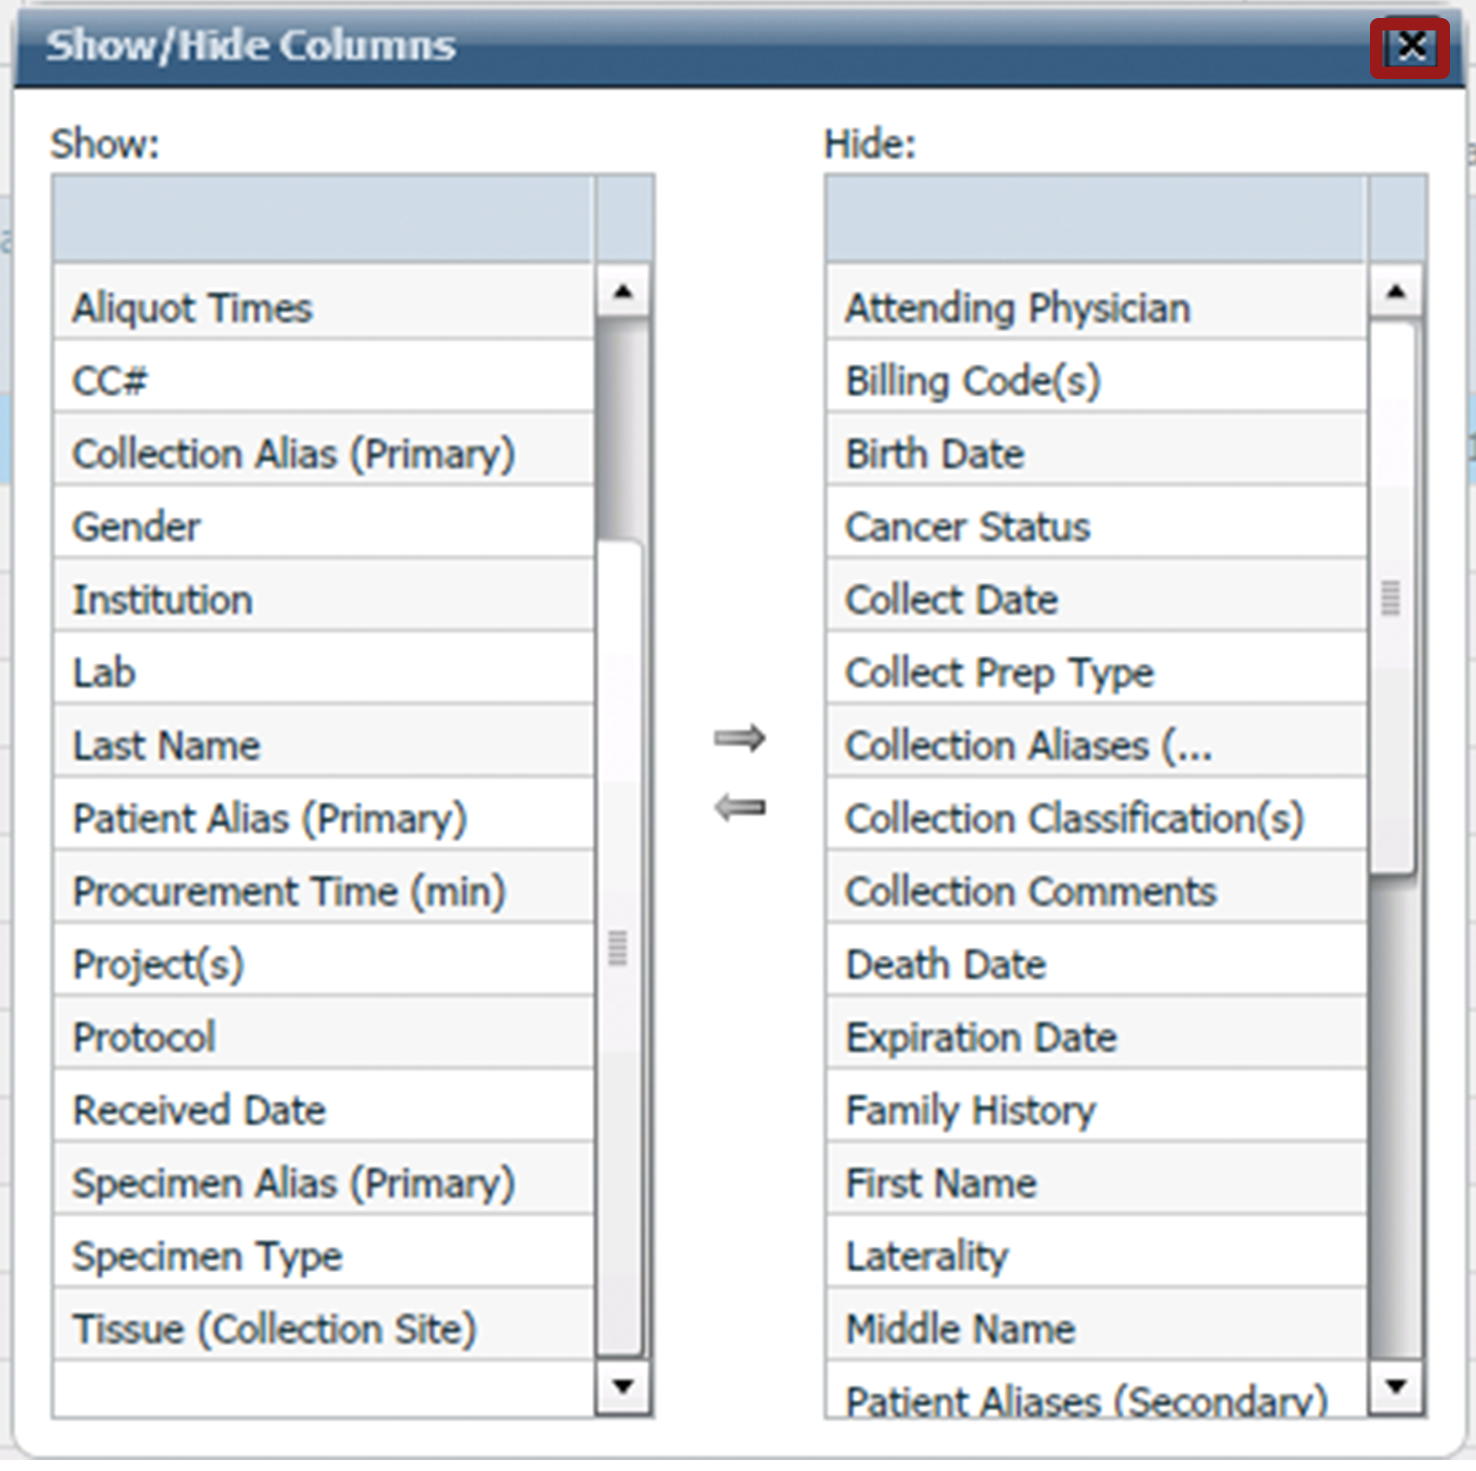
- To hide the columns that are unnecessary for your template, select a column header from the list in the Show grid. Once selected, click the arrow to move the header to the Hide grid. It will no longer appear in the template. Once hidden, a header can be shown by moving it back to the Show grid. Select the header from the list in the Hide grid and click the arrow.
- Once the column headers have been adjusted, click the X. The settings will now be reflected in the template.
- Click add to add a number of specimens that represents a typical number of specimens collected during the collection process.
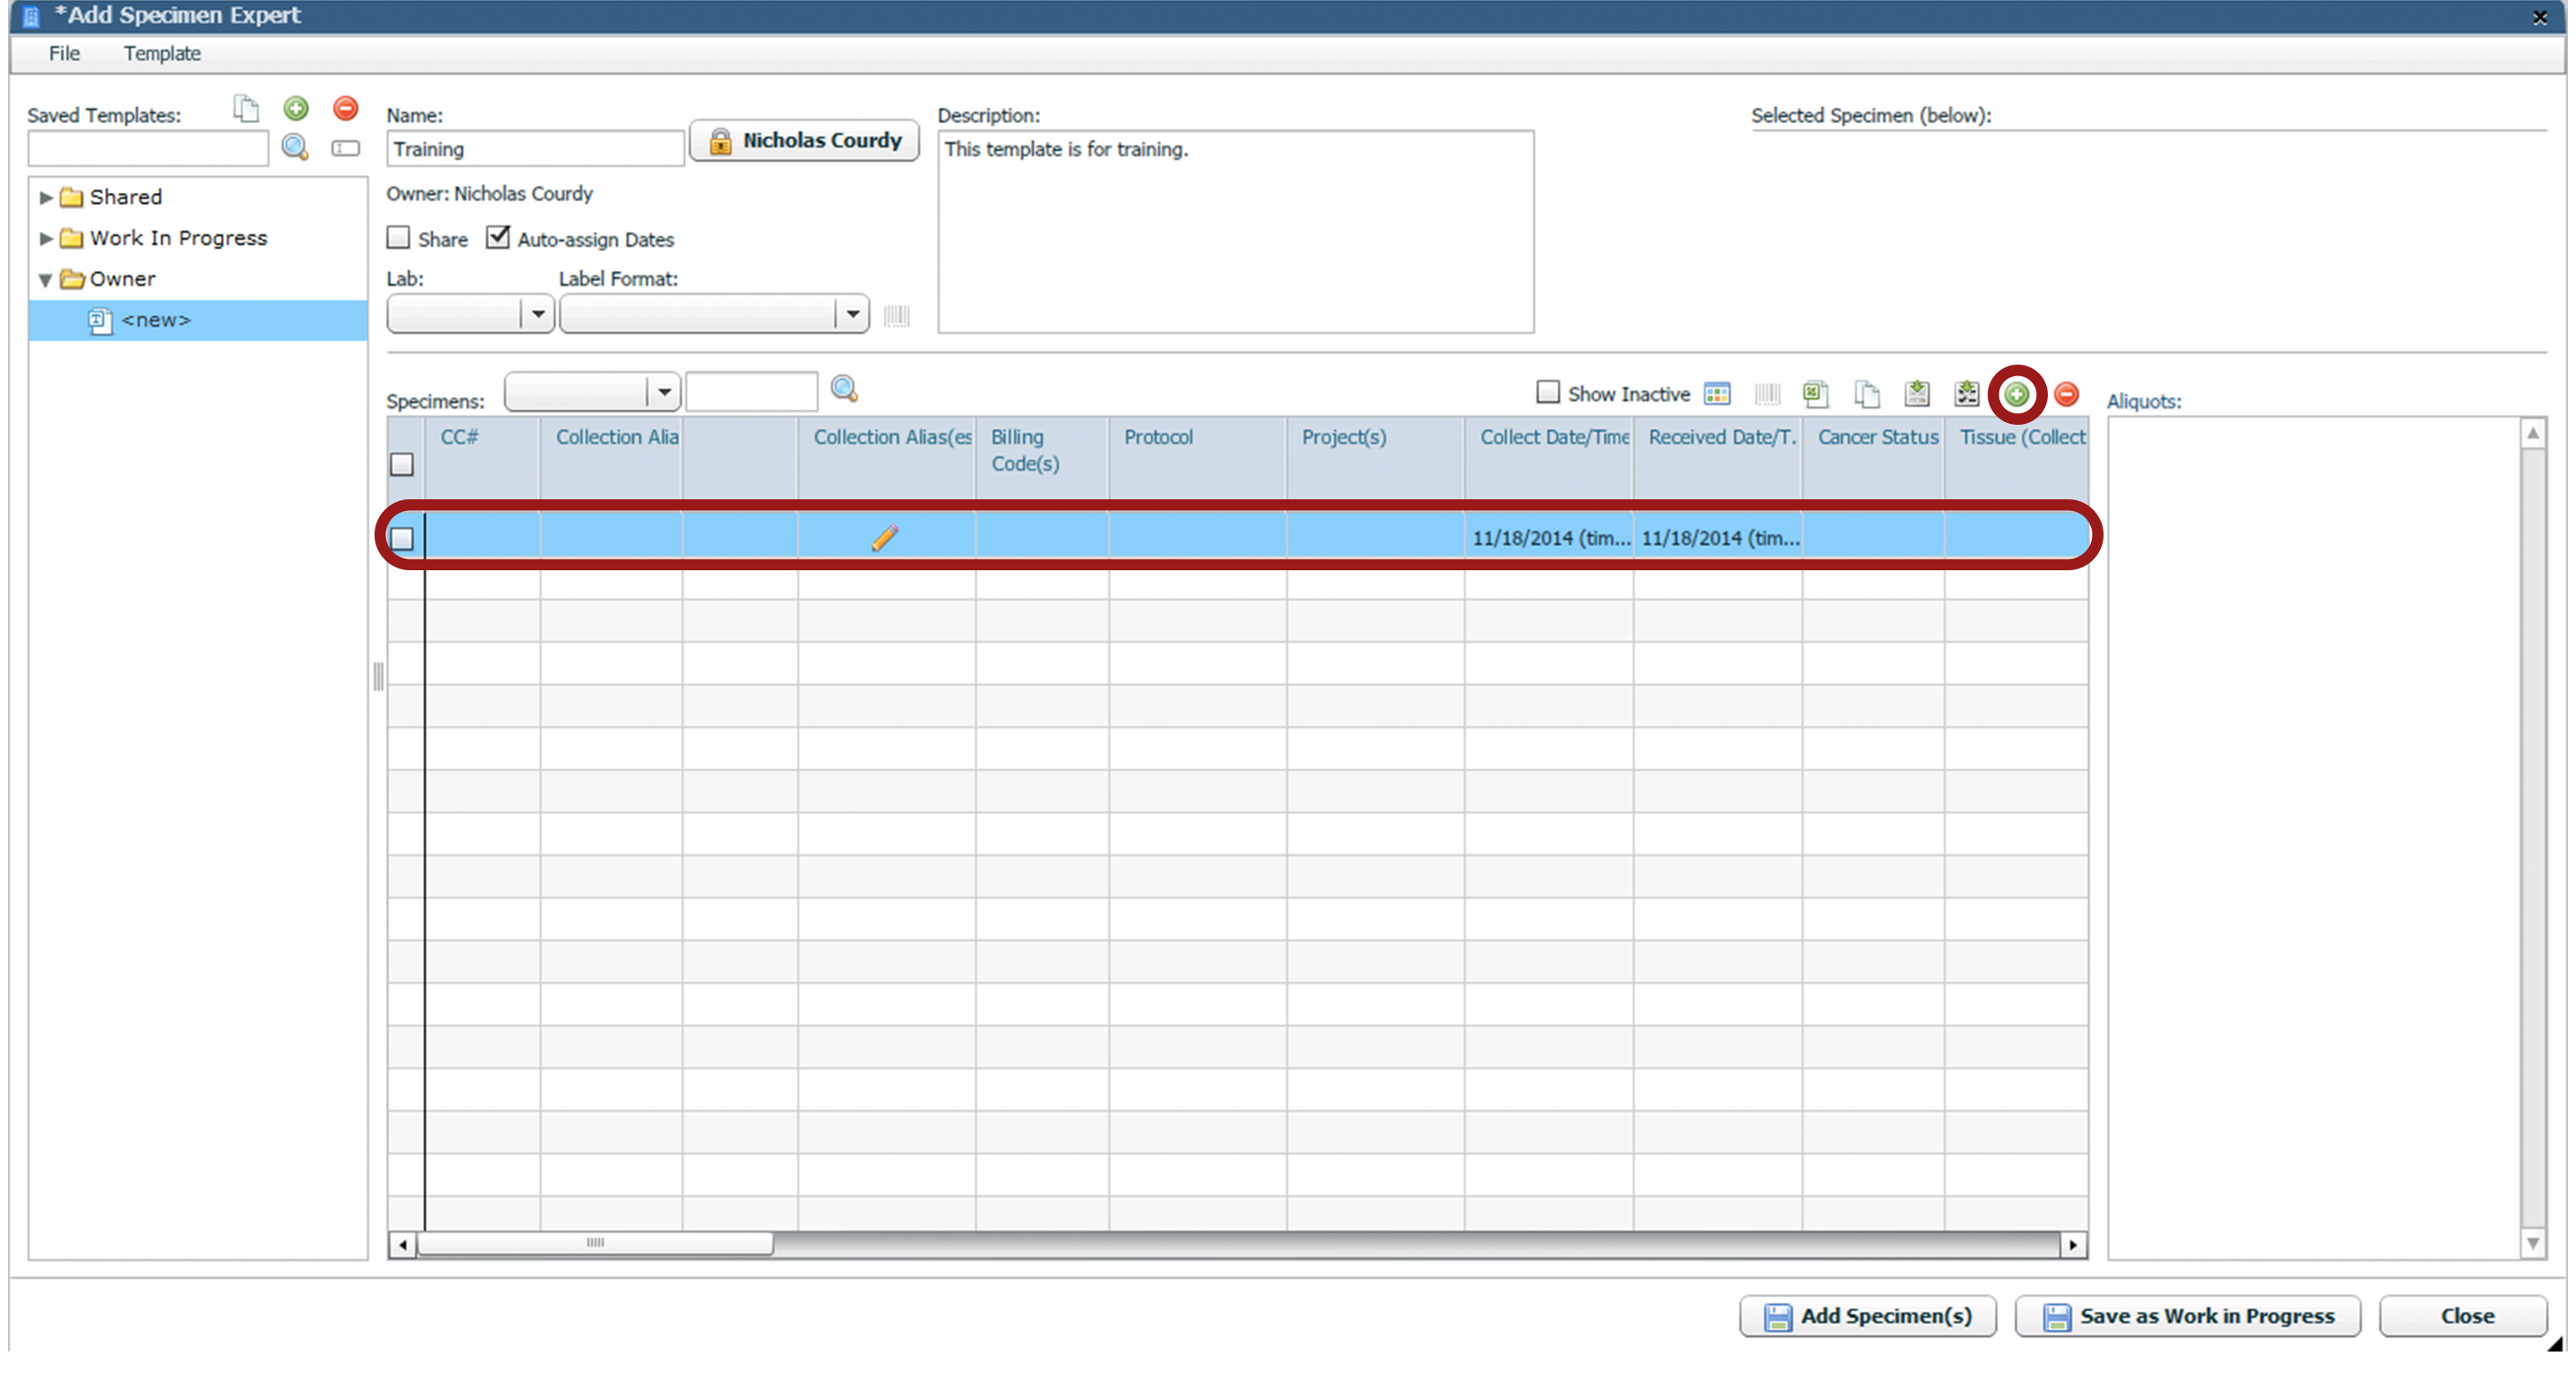
- Enter the default values for the specimens added during the collection. (For example, if the template will always be used to enter specimens collected under the same protocol, select the protocol in each specimen row. This ensures the specimens added using the template will always be associated to correct protocol.
- Save your template by selecting File-Save Template from the menu at the top of the window or hitting Ctrl+S. Once the template is saved, every time you use the template, it will load exactly as it appeared when you saved it as a starting point for adding new specimens.