- Welcome
- Use case
- Getting Started
-
Searching Records
- Performing a Basic Search
- Performing an Advanced Search
- Performing a List Search
- Performing a Keyword Search of UUMC Pathology Reports for all Patients in the Database
- Performing a Keyword Search of UUMC Pathology Reports for the Patients Associated with a Specific Set of Specimens
- Restrictions on Searches
- Reports
-
iQ Tool
- Adding Columns to a Query
- Starting the iQ Tool
- iQ Tool Window
- Current Query Data Group
- Saved Queries List
- Top Portion of the Selected
- Display or Report Columns Section
- Find/Filters Section
- Running a Preexisting Query
- Creating a Query
- Create Query Window
- Copying and Altering a Preexisting Query
- Removing Columns from a Query
- Editing Column Parameters in a Query
- Changing the Order of Columns in a Query
- Adding Filters to a Query
- Editing Filters in a Query
- Ways of Comparing Data
- Removing Filters From a Query
- Results Window
- Application Data Structure
- Application Database Fields Alphabetical List
- Application Datatree
- Field Paths List for the iQ Tool
-
Adding Specimens to the Database
- Adding a Single Specimen using the Add Specimen Wizard
- Adding a Batch of Specimens using the Add Specimen Expert Tool
- Saving a Batch of Specimens to be added as a Work in Progress
- Finishing a Work in Progress Batch
- Printing Barcodes for a Specimens in a Batch added using the Add Specimen Expert Tool
- Customizing the Add Specimen Expert Tool to Streamline Specimen Batch Entry
- Changing which Box an Add Expert Template Points for Adding Storage
- Importing FFPE Samples from UUMC
- Entering and Editing Specimen Records
- Transformations
- Specimen Disbursement and Registration
- Reports and Records
- Adding a Pathology Report to a Specimen Record
- Performing a DEXT Import of a Pathology Import
- Checking on the status of your DEXT Import Request
- Adding a Medical Record to a Specimen Record
- Editing Patient or Collection Records
- Editing Collection Records
- Editing Patient Records
- Diagnoses
- Adding a Diagnosis to a Patient Record
- Linking an Existing Diagnosis to one or more Collections
- Linking a Collection to a Diagnosis
- Recording a Consent for a Patient
- Reviewing a Patient's Consents
- Uploading a Patient's Consent Form
- Managing Patient Consents
- External (to itBioPath) Data Sources
- Managing Dictionaries
-
Storage
- Editing Aliquots
- Connecting a Barcode Label Printer to itBioPath
- Removing a Barcode Label Printer from itBioPath
- Freezer Management
- Viewing the Contents of a Box in a Freezer
- Accessing the Specimen Record for the Specimen associated with an Aliquot
- Editing Box Details
- Adding a New Box to a Freezer from the Add Aliquot Window
- Managing Protocols, Projects, and Related User Permissions
- Window, Tab, and Field Descriptions
- Miscellaneous
itBioPath has a module that will disburse an entire batch of specimens at the same time. This batch of specimens may be imported from the results of a search or it may be a batch of samples from which you have previously performed a batch disbursement (identified by a Batch ID number which is assigned upon performing a batch disbursement). In order to perform a batch disbursement from aliquots from different specimens, the specimens must have the same preparation type, the same unit type (Weight, Volume or Quantity), and the same metrics/measurements (microgram, mL, etc.). To deal with this requirement, if disbursements are necessary from different specimens that do not meet this requirement, a cohort may be formed as the result of a search that includes all of the specimens that are needed. A subgroup of this cohort can then be disbursed and a Batch ID number assigned. This Batch ID number can than be used to access the same cohort of specimens and perform batch disbursements on other subgroups of the cohort. To perform a batch disbursement of specimens:
- Perform a search for the cohort of specimens you would like to disburse from — see The Search Pane for instructions. (If you have a Batch ID to use to select your cohort, skip this step.)
One effective way to perform a search for a particular cohort of specimens is to perform a list search with a list of CC#'s (if you have such a list of specimens you would like to disburse) — see Performing a List Search.
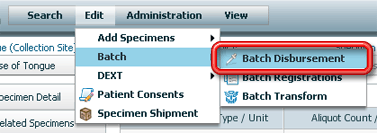
- Select Edit-Batch-Batch Disbursement from the menu bar at the top of the application. The Batch Specimen Disbursement window will open.
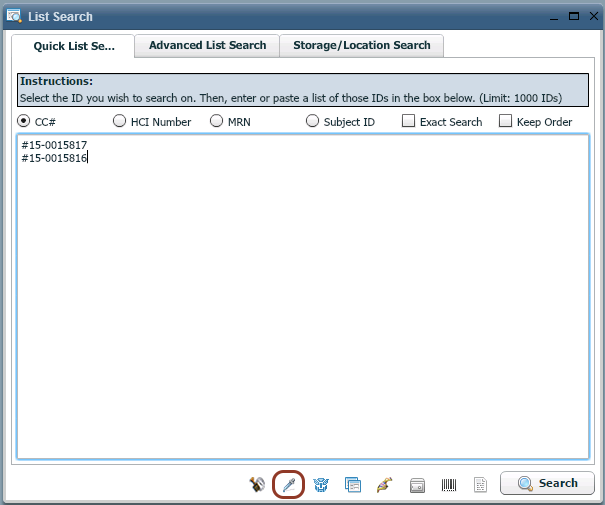
If you perform a list search (see above), there are buttons on the List Search window that can take you directly to the Batch Specimen Disbursement window, rather than requiring you to perform the search and then select the appropriate activity from the menu as two separate steps. Use the Batch Disbursement button.
- If you did not perform a search in step 1 (above), enter the appropriate Batch ID in the Batch ID field in the lower left corner of the window and click on the Load Specimen/Aliquots button to load the cohort associated with that Batch ID. (If you did perform the search in step 1 and do not have a Batch ID, skip this step.)
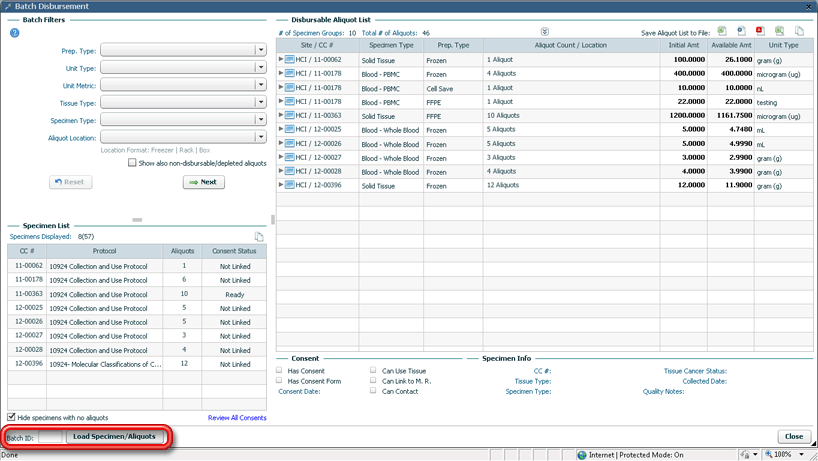
- Use the fields in the upper left corner of the window to filter the specimens in the selected cohort so that you are only dealing with specimens that have the same preparation type, unit type and metrics/measurements by selecting the values in those fields you want to deal with for this particular batch disbursement. The undepleted aliquot groups from your cohort of specimens that match those values will be displayed in the large grid to the right of these fields.
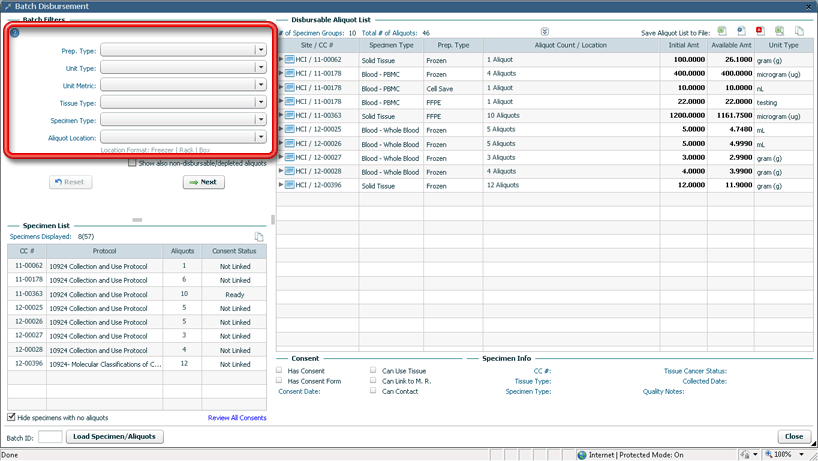
You may expand the aliquot groups listed in the grid by clicking on the triangle to the left of the aliquot group's row. This gives you access to individual aliquots for disbursement. Clicking on the triangle again will collapse the aliquot group so that only totals for the group are shown — no individual aliquots. You may also expand/contract all of the aliquot groups in the grid at the same time by clicking on the Expand/Close Aliquot List toggle button in the center above the grid.
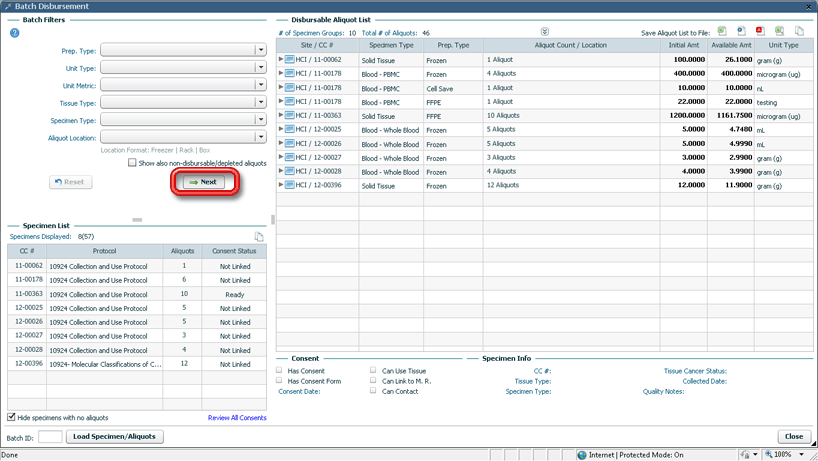
- Once the preparation type, unit type and metrics/measurements of the specimens remaining in the disbursement grid are all the same,
 below the filtering fields will be activated. Click
 to proceed to the next step. The list of aliquots will appear on the disbursement window.
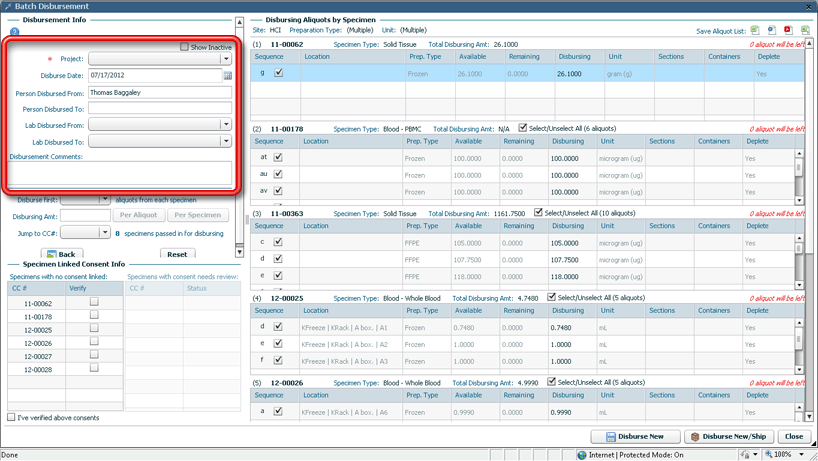
- Enter the disbursement project and other relevant disbursement information in the fields on the left side of the window.
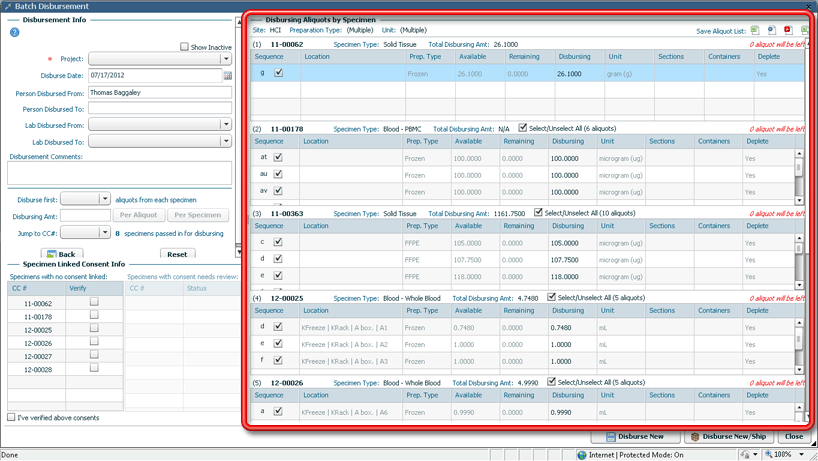
- Adjust the disbursement amounts as necessary for each specimen being disbursed in the grid on the right side of the window.
- Make sure that each specimen being disbursed has the appropriate patient consents. If a consent has not already been recorded in the database, you will need to manually confirm that a consent has been given but has simply not been entered yet by checking the appropriate boxes in the Consent Verifications area of the window (in the lower left corner).
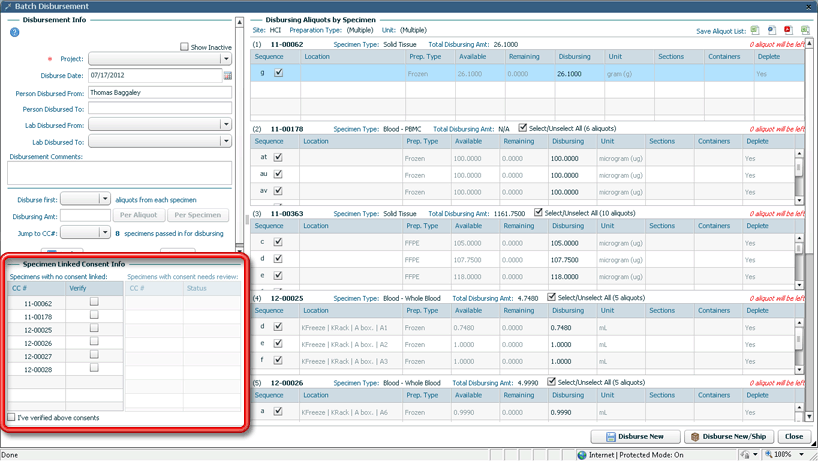
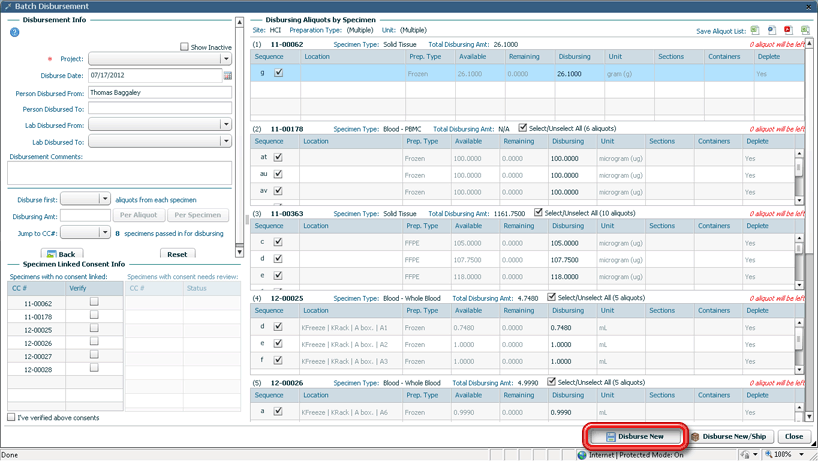
- Click
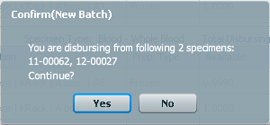
 . A confirmation window will appear, requesting your confirmation that disbursements are to be recorded for the number of specimens indicated.
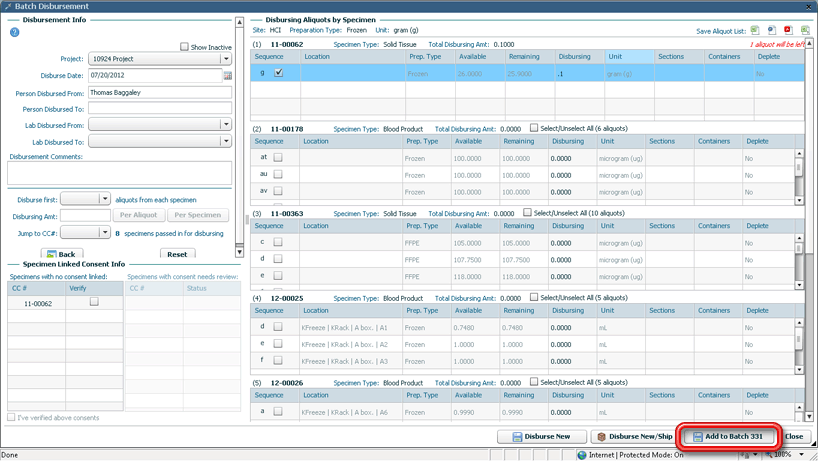
When working with a batch that has had previous disbursements (in other words you entered a batch ID), you may add this disbursement to the previous batch by clicking on the Add to Batch button. When  is clicked, a new batch ID will be issued for this new disbursement.
- Click Yes to confirm the disbursement. A window will appear summarizing the action taken, including the total amount disbursed in this particular disbursement, which specimens were disbursed from, which specimens were not disbursed from and why they were not included in the disbursement although they were a part of the original cohort of specimens selected and a complete list of specimens included in the batch, even if they were not disbursed from at this time.
The top left corner of this window will contain the Batch ID number. This Batch ID identifies all specimens included in the original search, whether you actually disbursed from them or at this time. Use this Batch ID to retrieve the same cohort of specimens in the future. If additional specimens from this batch still need to be disbursed, but could not be included in the first group because they used a different preparation type, unit type or measurement type, repeat the above steps using the Batch ID and choosing different values to filter the batch in a different way and disburse from the other samples.
- To perform more disbursements from the selected batch, click
 and repeat.
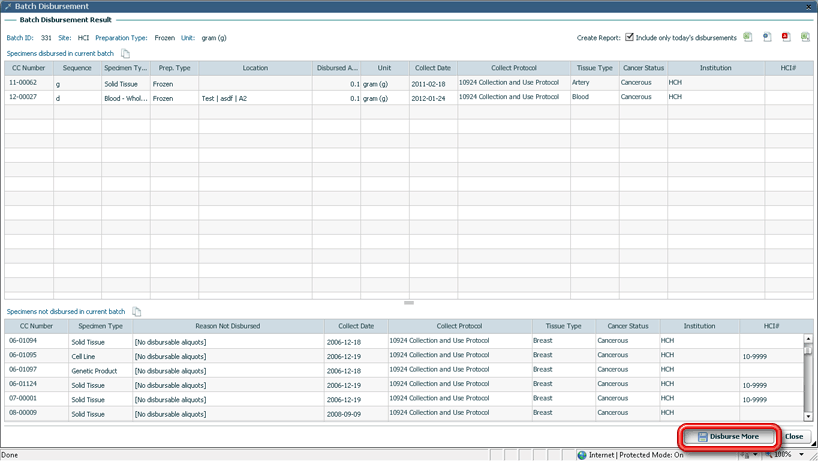
Before closing this window, generate a report of the disbursed specimens by clicking on the appropriate button on the top right side of the window.

Click the icons to generate a report in Excel  , CSV (a universal spreadsheet file type)
  , HTML
  , or PDF
  formats. Click
  to copy selected items to the clipboard. These buttons can also be found at other points within the batch disbursement window, allowing you to generate reports that indicate all of the aliquots in a batch or all of the aliquots being disbursed from depending on what point you are at in the wizard.
- Once all the disbursements are complete from this batch, click
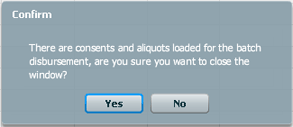
 in the lower right hand corner to close the window. If there are still undisbursed aliquots in the batch, a confirmation dialog will open asking you if you really want to close the Batch Disbursement window.
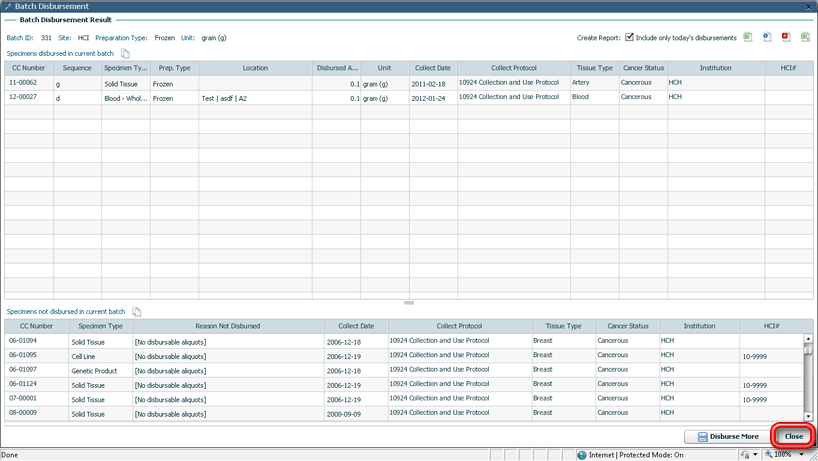
- Click Yes to confirm that you want to close the Batch Disbursement window.
