- Administration Apps
-
Clinical/Research Apps
- Cancer Clinical Research (CCR)
- Clinical Trials - OnCore
- Comprehensive Oncology Research Environment (CORE)
- CORE Browser
- CORE Browser FAQs
- iQ (Integrated Query Tool)
- itBioPath (RETIRED)
- LabVantage
- Metabuilder - BST - (itBioPath)
- Metabuilder - Pathology
- Metabuilder - RSR - (Subject)
- Patient Status Review - CCR
- PayTrac
- REDCap
- Research Subject Registry (RSR)
- Genomics Apps
Frequently Asked Questions
- As of now, we do not have PHI in CORE Browser and highly discourage users from adding PHI into the application. If you would like PHI in your organization, please contact the CORE Browser support at inf-CoreBrowserSupport@hci.utah.edu
- Click
 to submit a request to Cancer Bioinformatics support.
 - In Request Summary/Title, type "Lab Creation for (PI_Name or Lab_Name)".
- Click the "Create" button after you fill out the remaining fields and the support group will contact you within 3-4 business days.
- Click to submit a request to CORE Browser support.
- In the Summary field, type "
access for ". - In the Description, let us know the user's email address, UNID, and what role they should have (Manager or Member).
- Note: Users with Member role cannot manage lab users nor delete buckets.
- In the Category dropdown, please select "Technical".
- Click the "Create" button and the support group will get in touch with you within 3-4 business days.
-
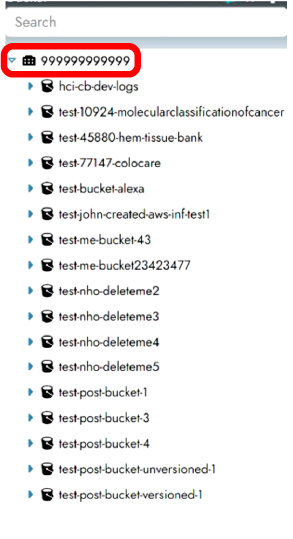
On the home page, click on the account that you would like to calculate in the side navigation tree.
-
In the Usage Summary Card click the "Calculator" icon

- Note: This process may take several minutes to complete.
- Archiving data is done automatically through lifecycles rules. Click to submit a request to CORE Browser support to change your lab's lifecycle rules.
-
Manually archive via CORE Browser.
- In the Object Explorer page, select the project, folder, and/or file you would like to archive.
- Click the "Advance" button
 and select "Archive".
 - In the dropdown, select the intended storage class and then click the "Archive" button.
- It can take up to 12 hours for an object to unarchive.
-
Unarchiving via CORE Browser.
- In the Object Explorer page, select the project, folder, and/or file you would like to unarchive.
- Click the "Advance" button and select "Unarchive".
- We suggest keeping the Restore tier as "Standard" and using the drop down next to Restore duration, select how many days you would like the object to be available.
- Click the "Unarchive" button and CORE Browser will display "AWS S3 (Unarchiving..)" in the source column,
- Repeat the process as needed.
- Note: CORE Browser will display "AWS S3 (Unarchived)" in the source column when unarchive has completed.
- In the Object Explorer page, verify that all the files in the projects, folders, and/or individual files you would like to share are unarchived and/or in AWS S3 (Standard) storage.
- Files that are still archived will fail to create a secure link. Please unarchive all files before proceeding.
- One at a time, select the project, folder, and/or file you would like to share.
- Click the "Advance" button and select "Secure link".
- Using the drop down, select how long you would like the link to stay active and click "Secure link".
- Click the "Copy to Clipboard" button and paste the link into the message body of your preferred email service.
- Repeat the process as needed and then send the email.
- Note: If you are sharing large amounts of data or need bucket-to-bucket transfers, to submit a request to CORE Browser support.
- If you have an active account with HCI Cancer Bioinformatics, GNomEx data will automatically be moved into CORE Browser.
-
Upload additional data via CORE Browser.
- In the Object Explorer page, on the grid, select where you would like to upload your data.
- Click the "Upload" button
 and select "S3" in the Storage Class dropdown.
 - Either click on the folder icon or the plus icon
 to upload a folder or a file.
 - Click "Upload".
- Do not close the browser and/or refresh the screen. Doing so will cancel the upload(s).
- The upload card will close when the upload progress has completed.
-
Advance Users: Upload additional data via AWS Command Line.
- Ensure that your AWS credentials are updated and the folder/file you want to upload is in your user's root directory.
- In a terminal, run:
aws s3 cp <FOLDER_NAME> s3://<DESTINATION_BUCKETNAME/FOLDERNAME/> --recursive --profile tmp- General
- Verify that all files in the project, folder, and/or individual files you would like are either unarchived and/or in AWS S3 (Standard) storage.
- Files that are still archived will fail to download. Please unarchive all files before proceeding.
-
Download via CORE Browser.
- Select the project, folder, and/or individual files you would like to download.
- Click the "Download" button
 and ensure that the projects, folders, and/or files are correct.
 - Click "Download".
- Repeat the process as needed.
- Do not close the browser and/or refresh the screen. Doing so will cancel the download(s).
- Your browser will display the download progress and completion
-
Download via Command Line.
- In CORE Browser, select the project, folder, and/or file you would like to download.
- Click "Advance" button and select "Secure link".
- Using the drop down, select how long you would like the link to stay active and then click "Secure link".
- Click the "Copy to Clipboard" button and paste the link into a .txt file
- Repeat process as needed.
- Download the links on CHPC using the Aria2 bulk downloader (curl or wget would work too, but aria2 is faster and more reliable).
- Run:
module load aria2 aria2c -i
<LINKS.txt>-
Advance Users: Download via AWS Command Line.
- Ensure that your AWS credentials are updated.
- In CORE Browser, select the project, folder, and/or file you would like to download.
- Click on the "Properties" button
 and copy the value in the S3 URI: field
 - In a terminal, run:
aws s3 cp s3://cb-example-bucket . --recursive --profile tmp- Login to CORE Browser.
- On the upper right of the navigation bar, you will see the user icon.
 Click on the user icon and select "Settings".
 - Select "Credentials".
- Here, you will select the organization you would like access keys for.
- Note:
- You will need to copy the values in "Access id", "Secret", and "Session token" fields for your AWS config file and/or running the
aws configure
- These credentials are valid for 12 hours.
-
Setting up your AWS Credentials
-
via Terminal
-
Run
aws configure --profile tmp- AWS Access Key ID [None]: Paste CORE Browser's Access id value
- AWS Secret Access Key [None]: Paste CORE Browser's Secret value
- Default region name [None]: us-east-1
- Default output format [None]: json
-
Run:
aws configure set aws_session_token <VALUE> --profile tmp- aws_session_token = Paste CORE Browser's Session token value
-
-
via AWS credentials file.
- Open
~/.aws/credentialsto open the AWS credentials file.
- Paste the below template into the AWS credentials file:
[tmp] aws_access_key_id=<CB_ACCESS_ID> aws_secret_access_key=<CB_SECRET> aws_session_token=<CB_SESSION_TOKEN> -
- Adjust the template with the values you located in CORE Browser and save.